
Phase 4 of 11


Pokemon Diamond and Pearl Phase 4: Fen Badge Walkthrough
 Fen Badge
Recover HM02, cross the southeast routes to Pastoria, explore the Great Marsh, and defeat Crasher Wake. 8 detailed sections with Diamond/Pearl encounters, trainers, items, puzzles, boss teams, and checklists.
Phase 4 Fen Badge Routes 214 and 213, Valor Lakefront, Pastoria City, Great Marsh, and Crasher Wake. 04 / 11 

Phase Snapshot
Phase 4: Fen Badge
Recover HM02, cross the southeast routes to Pastoria, explore the Great Marsh, and defeat Crasher Wake.
Data rows
Phase Sections
Major Battles And Partners
 Galactic GruntGalactic
Full team

Danger notes
Review the explicit team, levels, held items, and moves below before triggering the battle.
Practical counters
Bring healthy answers to the team's shared weaknesses and avoid entering with unresolved status or depleted PP.
Galactic GruntGalacticFull team

Danger notes
Review the explicit team, levels, held items, and moves below before triggering the battle.
Practical counters
Bring healthy answers to the team's shared weaknesses and avoid entering with unresolved status or depleted PP.
 Pokémon Trainer BarryPokémon Trainer Barry
Full team
 StarlyWing Attack / Quick Attack / Endeavor / Double Team
 BuizelAqua Jet / Quick Attack / Pursuit / Growl
 PonytaEmber / Stomp / Tail Whip / Growl
 GrotleRazor Leaf / Bite / Mega Drain / Withdraw
Practical counters
Pokémon Trainer BarryPokémon Trainer BarryFull team
- StarlyWing Attack / Quick Attack / Endeavor / Double Team
- BuizelAqua Jet / Quick Attack / Pursuit / Growl
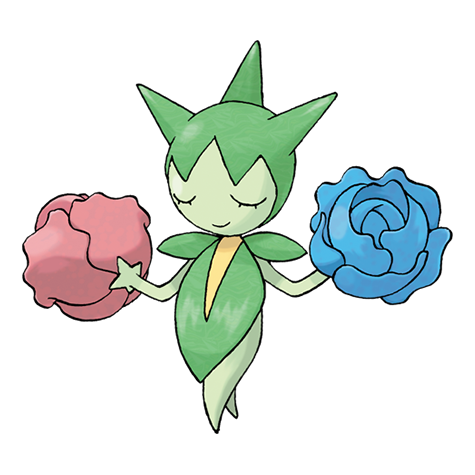 RoseliaMega Drain / Poison Sting / Leech Seed / Magical Leaf
 MonfernoFlame Wheel / Mach Punch / Fury Swipes / Leer
Practical counters
Pokémon Trainer BarryPokémon Trainer BarryFull team
- StarlyWing Attack / Quick Attack / Endeavor / Double Team
- RoseliaMega Drain / Poison Sting / Leech Seed / Magical Leaf
- PonytaEmber / Stomp / Tail Whip / Growl
 PrinplupBubble Beam / Peck / Metal Claw / Growl
Practical counters
 Leader WakeLeader Wake
Full team
 GyaradosBrine / Dragon Rage / Bite / Swagger
 QuagsireMud Bomb / Slam / Mud Sport / Tail Whip
 Floatzelholds Sitrus Berry • Brine / Ice Fang / Pursuit / Swift
Danger notes
Gyarados opens with Intimidate, Quagsire blanks Electric moves, and Floatzel is the fast closer.
Practical counters
Carry both Electric and Grass coverage. Grass deletes Quagsire; Electric pressures Gyarados and Floatzel.
 Pokémon Trainer LucasPokémon Trainer Lucas
Partner team
 ClefairyMetronome / Gravity / Wake Up Slap / Sing
 KadabraPsybeam / Psycho Cut / Reflect / Light Screen
- PrinplupBubble Beam / Metal Claw / Peck / Growl
Partner role
Lucas joins the player for this scripted Galactic double battle; the displayed team branch depends on the player character and starter allocation. Only one of the listed partner branches applies to a save.
How to use the partner
Focus both allied attacks on one Grunt to cut the opposing action count. This is a one-scene ally battle, not a repeatable trainer fight or healing escort.
Pokémon Trainer LucasPokémon Trainer LucasPartner team
- ClefairyMetronome / Gravity / Wake Up Slap / Sing
- KadabraPsybeam / Psycho Cut / Reflect / Light Screen
- GrotleRazor Leaf / Mega Drain / Bite / Curse
Partner role
Lucas joins the player for this scripted Galactic double battle; the displayed team branch depends on the player character and starter allocation. Only one of the listed partner branches applies to a save.
How to use the partner
Focus both allied attacks on one Grunt to cut the opposing action count. This is a one-scene ally battle, not a repeatable trainer fight or healing escort.
Pokémon Trainer LucasPokémon Trainer LucasPartner team
- ClefairyMetronome / Gravity / Wake Up Slap / Sing
- KadabraPsybeam / Psycho Cut / Reflect / Light Screen
- MonfernoFlame Wheel / Mach Punch / Fury Swipes / Torment
Partner role
Lucas joins the player for this scripted Galactic double battle; the displayed team branch depends on the player character and starter allocation. Only one of the listed partner branches applies to a save.
How to use the partner
Focus both allied attacks on one Grunt to cut the opposing action count. This is a one-scene ally battle, not a repeatable trainer fight or healing escort.
 Pokémon Trainer DawnPokémon Trainer Dawn
Partner team
- ClefairyMetronome / Gravity / Wake Up Slap / Sing
- KadabraPsybeam / Psycho Cut / Reflect / Light Screen
- PrinplupBubble Beam / Metal Claw / Peck / Growl
Partner role
Dawn joins the player for this scripted Galactic double battle; the displayed team branch depends on the player character and starter allocation. Only one of the listed partner branches applies to a save.
How to use the partner
Focus both allied attacks on one Grunt to cut the opposing action count. This is a one-scene ally battle, not a repeatable trainer fight or healing escort.
Pokémon Trainer DawnPokémon Trainer DawnPartner team
- ClefairyMetronome / Gravity / Wake Up Slap / Sing
- KadabraPsybeam / Psycho Cut / Reflect / Light Screen
- GrotleRazor Leaf / Mega Drain / Bite / Curse
Partner role
Dawn joins the player for this scripted Galactic double battle; the displayed team branch depends on the player character and starter allocation. Only one of the listed partner branches applies to a save.
How to use the partner
Focus both allied attacks on one Grunt to cut the opposing action count. This is a one-scene ally battle, not a repeatable trainer fight or healing escort.
Pokémon Trainer DawnPokémon Trainer DawnPartner team
- ClefairyMetronome / Gravity / Wake Up Slap / Sing
- KadabraPsybeam / Psycho Cut / Reflect / Light Screen
- MonfernoFlame Wheel / Mach Punch / Fury Swipes / Torment
Partner role
Dawn joins the player for this scripted Galactic double battle; the displayed team branch depends on the player character and starter allocation. Only one of the listed partner branches applies to a save.
How to use the partner
Focus both allied attacks on one Grunt to cut the opposing action count. This is a one-scene ally battle, not a repeatable trainer fight or healing escort.
Phase coverage
This phase covers 45 maps: 251 wild encounter entries, 69 trainers, 77 items and 35 hidden items.
Galactic Warehouse Rescue and HM02 Fly
Help Lucas or Dawn recover the stolen Pokedex, enter the warehouse vestibule, and collect HM02 Fly.
Source maps
Veilstone Galactic Warehouse Entrance.
Route Plan
Leave Maylene's Gym; meet the assistant near the warehouse; win the tag battle against two Grunts; follow the fleeing Grunt inside; collect HM02; use Fly to restock or finish unlocked Cut cleanups before heading south.
- The six source IDs represent Lucas/Dawn and starter branches for the allied side of the warehouse double battle, not six separate opponents.
- The locked warehouse door leads to Galactic HQ's basement and remains inaccessible until the Storage Key is obtained later.
Encounter tables on this page cover 1 in-game map.
Trainers
| Trainer | Route order / placement | Full team | Reward | Access requirement | Optional / rematch note |
|---|---|---|---|---|---|
| Galactic GruntGalactic | Galactic Warehouse Rescue and HM02 Fly • boss | ₽1,000 | Story battle assigned to this section; save and prepare before the trigger described in the route plan. | Major or story battle; not a VS Seeker rematch row. | |
| Galactic GruntGalactic | Galactic Warehouse Rescue and HM02 Fly • boss | ₽1,000 | Story battle assigned to this section; save and prepare before the trigger described in the route plan. | Major or story battle; not a VS Seeker rematch row. |
Items
| Item | Version | Type | Area / exact direction | Map position | Requirement | Source |
|---|---|---|---|---|---|---|
| Dusk Stone | Diamond / Pearl | Visible item ball | Veilstone Galactic Warehouse Entrance: Pick up the item ball in the northwestern part of Veilstone Galactic Warehouse Entrance, 6 tiles west and 1 tile south of the Veilstone Galactic Headquarters B2F doorway or transition. | (7, 4) | See the route notes for any HM, Bicycle, time or story requirement. | Story event |
| HM02 | Diamond / Pearl | Visible item ball | Veilstone Galactic Warehouse Entrance: Pick up the item ball in the eastern part of Veilstone Galactic Warehouse Entrance, 5 tiles south of the Veilstone Galactic Headquarters B2F doorway or transition. | (13, 8) | See the route notes for any HM, Bicycle, time or story requirement. | Story event |
| HM02 Fly | Diamond / Pearl | Field pickup | Galactic Warehouse Rescue and HM02 Fly: Inside the Galactic warehouse entrance after the Pokedex recovery battle; field use requires the Cobble Badge. | NPC | See the route plan. | editorial script/system note |
Puzzles, Warps, And Switches
- Focus both player-side attacks on one Grunt at a time to prevent the assistant's Clefairy from being overwhelmed. HM02 lies just inside after the Grunts retreat.
Completion Checklist
- Complete the currently reachable part of this route plan: Leave Maylene's Gym; meet the assistant near the warehouse; win the tag battle against two Grunts; follow the fleeing Grunt inside; collect HM02; use Fly to restock or finish unlocked Cut cleanups before heading south.
Route 214 and Ruin Maniac Cave
Clear Veilstone's south road, explore the expanding Ruin Maniac tunnel, and connect Unown collection to the hidden punctuation chamber.
Source maps
Ruin Maniac Cave Stage 1, Route 214, Route 214 Veilstone Gatehouse, Ruin Maniac Cave Stage 2, and Ruin Maniac Cave Stage 3.
Route Plan
Sweep both Route 214 lanes; collect berries, visible items, and Dowsing spots; enter Ruin Maniac Cave; record the current tunnel stage; catch more Unown in Solaceon before returning for later stages; continue to Valor Lakefront.
- The tunnel length changes with the number of distinct Unown forms caught. At 26 letter forms it reaches the chamber containing Unown ! and ?.
- Hippopotas is available in the cave, with its encounter space expanding as the digging project advances.
Encounter tables on this page cover 5 in-game maps.
Route 214
| Pokémon | Games | Levels | Rate | Requirement / notes | ||
|---|---|---|---|---|---|---|
| Morning | Day | Night | ||||
| Grass / cave floor | ||||||
| Ponyta | DP | 23-24 | 35% | 35% | 25% | Rate counts base slots temporarily replaced by the daily swarm. |
 Kricketune | DP | 23-24 | 5% | 5% | 25% | — |
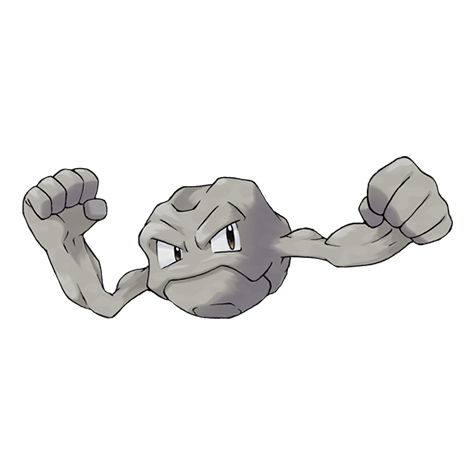 Geodude | DP | 22 | 20% | Rate counts base slots temporarily replaced by the daily swarm. | ||
 Graveler | DP | 23-24 | 15% | 15% | 5% | Rate counts base slots temporarily replaced by hard-shaking Poké Radar patches and GBA dual-slot insertions. |
 Stunky | DP | 23-24 | 15% | Rate counts base slots temporarily replaced by hard-shaking Poké Radar patches and GBA dual-slot insertions. | ||
 Sudowoodo | DP | 23-24 | 15% | Rate counts base slots temporarily replaced by hard-shaking Poké Radar patches and GBA dual-slot insertions. | ||
 Girafarig | DP | 24 | 10% | Rate counts base slots temporarily replaced by hard-shaking Poké Radar patches. | ||
| Swarm (post-National Dex daily announcement) | ||||||
 Spoink | DP | 22-23 | 40% | Post-National Dex daily swarm; replaces grass slots 0-1. | ||
| Poké Radar (post-National Dex) | ||||||
 Houndoom | DP | 23-24 | 22% | National Dex and Poké Radar required; replacement slot applies only in a hard/vigorous-shaking Radar patch. | ||
 Mightyena | DP | 23-24 | 22% | National Dex and Poké Radar required; replacement slot applies only in a hard/vigorous-shaking Radar patch. | ||
| Dual-slot GBA insertion (post-National Dex) | ||||||
 Gligar | DP | 24 | 8% | National Dex plus Pokémon Emerald inserted in the Nintendo DS GBA slot; replaces grass slots 8-9. | ||
 Vulpix | DP | 24 | 8% | National Dex plus Pokémon LeafGreen inserted in the Nintendo DS GBA slot; replaces grass slots 8-9. | ||
| Surfing | ||||||
 Psyduck | DP | 20-40 | 90% | — | ||
 Golduck | DP | 20-40 | 10% | — | ||
| Fishing — Old Rod | ||||||
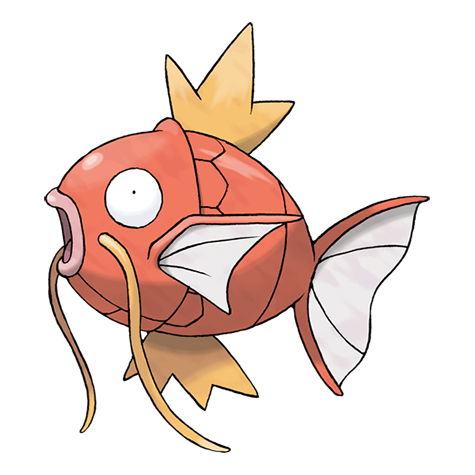 Magikarp | DP | 3-10 | 100% | — | ||
| Fishing — Good Rod | ||||||
| Magikarp | DP | 10-25 | 55% | — | ||
 Goldeen | DP | 10-25 | 45% | — | ||
| Fishing — Super Rod | ||||||
| Gyarados | DP | 30-55 | 55% | — | ||
 Seaking | DP | 20-50 | 45% | — | ||
Ruin Maniac Cave Stage 1
| Pokémon | Games | Levels | Rate | Requirement / notes | ||
|---|---|---|---|---|---|---|
| Morning | Day | Night | ||||
| Grass / cave floor | ||||||
| Geodude | DP | 22 | 95% | — | ||
 Hippopotas | DP | 22-23 | 5% | — | ||
Ruin Maniac Cave Stage 2
| Pokémon | Games | Levels | Rate | Requirement / notes | ||
|---|---|---|---|---|---|---|
| Morning | Day | Night | ||||
| Grass / cave floor | ||||||
| Geodude | DP | 23 | 90% | — | ||
| Hippopotas | DP | 22-24 | 10% | — | ||
Ruin Maniac Cave Stage 3
| Pokémon | Games | Levels | Rate | Requirement / notes | ||
|---|---|---|---|---|---|---|
| Morning | Day | Night | ||||
| Grass / cave floor | ||||||
| Geodude | DP | 24 | 80% | — | ||
| Hippopotas | DP | 22-25 | 20% | — | ||
Trainers
| Trainer | Route order / placement | Full team | Reward | Access requirement | Optional / rematch note |
|---|---|---|---|---|---|
 PI CarlosPI | Route 214 • trainer 1 on this map | ₽2,760 | Line of sight decides whether you can walk past this trainer. | Vs. Seeker rematch levels: Lv. 36/Lv. 37/Lv. 38; Lv. 56/Lv. 57/Lv. 58. | |
 Collector DouglasCollector | Route 214 • trainer 2 on this map | ₽1,536 | Line of sight decides whether you can walk past this trainer. | No Vs. Seeker rematch. | |
| Collector BradyCollector | Route 214 • trainer 3 on this map | ₽1,536 | Line of sight decides whether you can walk past this trainer. | No Vs. Seeker rematch. | |
 Ruin Maniac BryanRuin Maniac | Route 214 • trainer 4 on this map | ₽1,104 | Line of sight decides whether you can walk past this trainer. | No Vs. Seeker rematch. | |
| Ruin Maniac HunterRuin Maniac | Route 214 • trainer 5 on this map | ₽1,248 | Line of sight decides whether you can walk past this trainer. | No Vs. Seeker rematch. | |
| Collector JamalCollector | Route 214 • trainer 6 on this map | ₽1,536 | Line of sight decides whether you can walk past this trainer. | No Vs. Seeker rematch. | |
 Beauty DevonBeauty | Route 214 • trainer 7 on this map | ₽1,400 | Line of sight decides whether you can walk past this trainer. | No Vs. Seeker rematch. | |
 Psychic Male MitchellPsychic Male | Route 214 • trainer 8 on this map | ₽736 | Line of sight decides whether you can walk past this trainer. | Vs. Seeker rematch levels: Lv. 38/Lv. 42; Lv. 58/Lv. 58. | |
 Psychic Female AbigailPsychic Female | Route 214 • trainer 9 on this map | ₽768 | Line of sight decides whether you can walk past this trainer. | Vs. Seeker rematch levels: Lv. 37/Lv. 39/Lv. 38; Lv. 58/Lv. 57/Lv. 59. |


Items
| Item | Version | Type | Area / exact direction | Map position | Requirement | Source |
|---|---|---|---|---|---|---|
| TM28 | Diamond / Pearl | Visible item ball | Ruin Maniac Cave Stage 1: At the far end of the active Ruin Maniac tunnel. This one persistent pickup moves outward as the cave expands; the three stage objects are not three copies. | (4, 3) | Reach the current tunnel endpoint; catching more distinct Unown expands the route but does not reset the pickup. | Story event |
| Rare Candy | Diamond / Pearl | Visible item ball | Route 214: Pick up the item ball in the northeastern part of Route 214, 12 tiles east and 3 tiles south of the Route 214 Veilstone Gatehouse doorway or transition. | (731, 648) | See the route notes for any HM, Bicycle, time or story requirement. | Story event |
| X Sp Def | Diamond / Pearl | Visible item ball | Route 214: Pick up the item ball in the eastern part of Route 214, 20 tiles east and 4 tiles south of the Ruin Maniac Cave Stage 1 doorway or transition. | (733, 674) | See the route notes for any HM, Bicycle, time or story requirement. | Story event |
| Max Potion | Diamond / Pearl | Visible item ball | Route 214: Pick up the item ball in the southwestern part of Route 214, 1 tile east and 52 tiles south of the Ruin Maniac Cave Stage 1 doorway or transition. | (714, 722) | See the route notes for any HM, Bicycle, time or story requirement. | Story event |
| Big Root | Diamond / Pearl | Visible item ball | Route 214: Pick up the item ball in the southern part of Route 214, 11 tiles east and 31 tiles south of the Ruin Maniac Cave Stage 1 doorway or transition. | (724, 701) | See the route notes for any HM, Bicycle, time or story requirement. | Story event |
| Cheri Berry | Diamond / Pearl | Berry tree | Route 214: Harvest berry patch 66 in the northeastern part of Route 214, 9 tiles east and 15 tiles south of the Route 214 Veilstone Gatehouse doorway or transition. The plot can be replanted after the initial harvest. | (728, 660) | Reach the outdoor patch on the named route or town; harvest its initial berries before planting a replacement. | berry table ov52_021D76F8, patch 66 |
| Sitrus Berry | Diamond / Pearl | Berry tree | Route 214: Harvest berry patch 67 in the northeastern part of Route 214, 10 tiles east and 15 tiles south of the Route 214 Veilstone Gatehouse doorway or transition. The plot can be replanted after the initial harvest. | (729, 660) | Reach the outdoor patch on the named route or town; harvest its initial berries before planting a replacement. | berry table ov52_021D76F8, patch 67 |
| Chesto Berry | Diamond / Pearl | Berry tree | Route 214: Harvest berry patch 68 in the northeastern part of Route 214, 11 tiles east and 15 tiles south of the Route 214 Veilstone Gatehouse doorway or transition. The plot can be replanted after the initial harvest. | (730, 660) | Reach the outdoor patch on the named route or town; harvest its initial berries before planting a replacement. | berry table ov52_021D76F8, patch 68 |
| Pomeg Berry | Diamond / Pearl | Berry tree | Route 214: Harvest berry patch 69 in the northeastern part of Route 214, 12 tiles east and 15 tiles south of the Route 214 Veilstone Gatehouse doorway or transition. The plot can be replanted after the initial harvest. | (731, 660) | Reach the outdoor patch on the named route or town; harvest its initial berries before planting a replacement. | berry table ov52_021D76F8, patch 69 |
Hidden Items
| Hidden item | Area / plain-English placement | QA coordinate | Requirement | Source |
|---|---|---|---|---|
| Heart Scale | Route 214: Use the Dowsing Machine in the central part of Route 214, 11 tiles east and 25 tiles south of the Ruin Maniac Cave Stage 1 doorway or transition and inspect that exact ground tile. | (724, 695) | Found with the Dowsing Machine Pokétch app. See the route notes for any HM, Bicycle, time or story requirement. | Story event |
| Honey | Route 214: Use the Dowsing Machine in the eastern part of Route 214, 21 tiles east and 11 tiles south of the Ruin Maniac Cave Stage 1 doorway or transition and inspect that exact ground tile. | (734, 681) | Found with the Dowsing Machine Pokétch app. See the route notes for any HM, Bicycle, time or story requirement. | Story event |
| Tinymushroom | Route 214: Use the Dowsing Machine in the southern part of Route 214, 9 tiles east and 34 tiles south of the Ruin Maniac Cave Stage 1 doorway or transition and inspect that exact ground tile. | (722, 704) | Found with the Dowsing Machine Pokétch app. See the route notes for any HM, Bicycle, time or story requirement. | Story event |
Puzzles, Warps, And Switches
- Route 214's fence lanes reconnect through Cut gaps. Clear the western trainer lane first, then the eastern grass and cave entrances to avoid backtracking.
- Treat each Ruin Maniac stage as a state of the same tunnel; do not present Stage 1, 2, and 3 as three independently visitable dungeons.
Completion Checklist
- Complete the currently reachable part of this route plan: Sweep both Route 214 lanes; collect berries, visible items, and Dowsing spots; enter Ruin Maniac Cave; record the current tunnel stage; catch more Unown in Solaceon before returning for later stages; continue to Valor Lakefront.
- Review all 25 encounter rows across the per-area tables, including game markers, method band, time-of-day rates, levels, and each conditional requirement; mark conditional rows for their stated revisit.
Valor Lakefront and Hotel Grand Lake
Explore the resort grounds, clear the Seven Stars Restaurant, collect room rewards, and mark Lake Valor's blocked entrance.
Source maps
Valor Lakefront, Valor Lakefront Seven Stars Restaurant, Valor Lakefront Grand Lake East Room, and Valor Lakefront Grand Lake West Room.
Route Plan
Check every hotel room; battle the restaurant's daily trainer pairs before closing time; inspect the Galactic-blocked lake entrance; continue south to Route 213; use the Dowsing Machine near reception there to find the Suite Key, then return it to its owner for the Lava Cookie.
- Seven Stars Restaurant trainer battles are available daily from 09:00 through 22:59. The doors close at 23:00, so the 20:00-22:59 encounter-night hours still count as restaurant business hours.
- Each day the restaurant activates five unique trainer pairs selected from its nine-pair pool. The trainer table lists all 18 possible opponents, not 18 simultaneous daily battles.
- Lake Valor itself uses separate normal and Galactic maps and is intentionally excluded from this resort section.
Encounter tables on this page cover 4 in-game maps.
Wild Pokémon
| Pokémon | Games | Levels | Rate | Requirement / notes | ||
|---|---|---|---|---|---|---|
| Morning | Day | Night | ||||
| Grass / cave floor | ||||||
| Girafarig | DP | 21-22 | 30% | Rate counts base slots temporarily replaced by hard-shaking Poké Radar patches. | ||
| Kricketune | DP | 21-22 | 5% | 5% | 25% | — |
| Geodude | DP | 20 | 20% | — | ||
 Bibarel | DP | 21-22 | 15% | Rate counts base slots temporarily replaced by hard-shaking Poké Radar patches. | ||
| Graveler | DP | 21-22 | 15% | 15% | 5% | Rate counts base slots temporarily replaced by hard-shaking Poké Radar patches. |
 Staravia | DP | 21-22 | 15% | 15% | 5% | — |
| Poké Radar (post-National Dex) | ||||||
 Nidorina | DP | 21-22 | 20% | National Dex and Poké Radar required; replacement slot applies only in a hard/vigorous-shaking Radar patch. | ||
 Nidorino | DP | 21-22 | 20% | National Dex and Poké Radar required; replacement slot applies only in a hard/vigorous-shaking Radar patch. | ||
| Nidorina | DP | 22 | 2% | National Dex and Poké Radar required; replacement slot applies only in a hard/vigorous-shaking Radar patch. | ||
| Nidorino | DP | 22 | 2% | National Dex and Poké Radar required; replacement slot applies only in a hard/vigorous-shaking Radar patch. | ||
Trainers
| Trainer | Route order / placement | Full team | Reward | Access requirement | Optional / rematch note |
|---|---|---|---|---|---|
| Galactic GruntGalactic | Valor Lakefront • scripted | ₽1,000 | Fen Badge required; this Galactic Grunt battle occurs only during the Pastoria-to-Route-213 chase after Crasher Wake, not on the first Hotel Grand Lake visit. | Script-triggered battle; not treated as an ordinary field rematch. | |
 Artist IsmaelArtist | Valor Lakefront Seven Stars Restaurant • scripted | ₽1,104 | Daily restaurant battles are available from 09:00 through 22:59; five unique pairs are selected from the nine-pair pool each day. | Script-triggered battle; not treated as an ordinary field rematch. | |
| Beauty HarleyBeauty | Valor Lakefront Seven Stars Restaurant • scripted | ₽1,288 | Daily restaurant battles are available from 09:00 through 22:59; five unique pairs are selected from the nine-pair pool each day. | Script-triggered battle; not treated as an ordinary field rematch. | |
 Rich Boy RomanRich Boy | Valor Lakefront Seven Stars Restaurant • scripted | ₽3,680 | Daily restaurant battles are available from 09:00 through 22:59; five unique pairs are selected from the nine-pair pool each day. | Script-triggered battle; not treated as an ordinary field rematch. | |
 Lady KylieLady | Valor Lakefront Seven Stars Restaurant • scripted | ₽3,360 | Daily restaurant battles are available from 09:00 through 22:59; five unique pairs are selected from the nine-pair pool each day. | Script-triggered battle; not treated as an ordinary field rematch. | |
 Gentleman LeonardoGentleman | Valor Lakefront Seven Stars Restaurant • scripted | ₽4,200 | Daily restaurant battles are available from 09:00 through 22:59; five unique pairs are selected from the nine-pair pool each day. | Script-triggered battle; not treated as an ordinary field rematch. | |
 Socialite RebeccaSocialite | Valor Lakefront Seven Stars Restaurant • scripted | ₽4,000 | Daily restaurant battles are available from 09:00 through 22:59; five unique pairs are selected from the nine-pair pool each day. | Script-triggered battle; not treated as an ordinary field rematch. | |
| Collector EugeneCollector | Valor Lakefront Seven Stars Restaurant • scripted | ₽1,280 | Daily restaurant battles are available from 09:00 through 22:59; five unique pairs are selected from the nine-pair pool each day. | Script-triggered battle; not treated as an ordinary field rematch. | |
 Aroma Lady AlisonAroma Lady | Valor Lakefront Seven Stars Restaurant • scripted | ₽736 | Daily restaurant battles are available from 09:00 through 22:59; five unique pairs are selected from the nine-pair pool each day. | Script-triggered battle; not treated as an ordinary field rematch. | |
 School Kid Male EstebanSchool Kid Male | Valor Lakefront Seven Stars Restaurant • scripted |
| ₽460 | Daily restaurant battles are available from 09:00 through 22:59; five unique pairs are selected from the nine-pair pool each day. | Script-triggered battle; not treated as an ordinary field rematch. |
 Pokefan Female MeredithPokefan Female | Valor Lakefront Seven Stars Restaurant • scripted | ₽1,344 | Daily restaurant battles are available from 09:00 through 22:59; five unique pairs are selected from the nine-pair pool each day. | Script-triggered battle; not treated as an ordinary field rematch. | |
 Veteran EmanuelVeteran | Valor Lakefront Seven Stars Restaurant • scripted | ₽1,840 | Daily restaurant battles are available from 09:00 through 22:59; five unique pairs are selected from the nine-pair pool each day. | Script-triggered battle; not treated as an ordinary field rematch. | |
 Lass BlytheLass | Valor Lakefront Seven Stars Restaurant • scripted | ₽336 | Daily restaurant battles are available from 09:00 through 22:59; five unique pairs are selected from the nine-pair pool each day. | Script-triggered battle; not treated as an ordinary field rematch. | |
 Cameraman DarrylCameraman | Valor Lakefront Seven Stars Restaurant • scripted | ₽672 | Daily restaurant battles are available from 09:00 through 22:59; five unique pairs are selected from the nine-pair pool each day. | Script-triggered battle; not treated as an ordinary field rematch. | |
 Reporter ValerieReporter | Valor Lakefront Seven Stars Restaurant • scripted | ₽920 | Daily restaurant battles are available from 09:00 through 22:59; five unique pairs are selected from the nine-pair pool each day. | Script-triggered battle; not treated as an ordinary field rematch. | |
| PI KendrickPI | Valor Lakefront Seven Stars Restaurant • scripted | ₽2,640 | Daily restaurant battles are available from 09:00 through 22:59; five unique pairs are selected from the nine-pair pool each day. | Script-triggered battle; not treated as an ordinary field rematch. | |
| Beauty GabriellaBeauty | Valor Lakefront Seven Stars Restaurant • scripted | ₽1,288 | Daily restaurant battles are available from 09:00 through 22:59; five unique pairs are selected from the nine-pair pool each day. | Script-triggered battle; not treated as an ordinary field rematch. | |
 Scientist EmilioScientist | Valor Lakefront Seven Stars Restaurant • scripted | ₽1,104 | Daily restaurant battles are available from 09:00 through 22:59; five unique pairs are selected from the nine-pair pool each day. | Script-triggered battle; not treated as an ordinary field rematch. | |
 Pokémon Breeder Female KayleePokémon Breeder Female | Valor Lakefront Seven Stars Restaurant • scripted | ₽1,008 | Daily restaurant battles are available from 09:00 through 22:59; five unique pairs are selected from the nine-pair pool each day. | Script-triggered battle; not treated as an ordinary field rematch. |


Items
| Item | Version | Type | Area / exact direction | Map position | Requirement | Source |
|---|---|---|---|---|---|---|
| TM85 | Diamond / Pearl | Visible item ball | Valor Lakefront: Pick up the item ball in the central part of Valor Lakefront, 3 tiles west and 2 tiles south of the Valor Lakefront Grand Lake East Room doorway or transition. | (712, 783) | See the route notes for any HM, Bicycle, time or story requirement. | Story event |
| Parlyz Heal | Diamond / Pearl | Visible item ball | Valor Lakefront: Pick up the item ball in the eastern part of Valor Lakefront, 2 tiles east and 8 tiles south of the Lake Valor Galactic doorway or transition. | (719, 769) | See the route notes for any HM, Bicycle, time or story requirement. | Story event |
| Secretpotion | Diamond / Pearl | NPC / scripted gift | Valor Lakefront: Cynthia gives it at Valor Lakefront after the Pastoria Galactic Grunt chase. | NPC (723, 760) | Earn the Fen Badge and pursue the Galactic Grunt from Pastoria through Route 213 to Valor Lakefront. | script bank 381 |
| Lava Cookie | Diamond / Pearl | NPC / scripted gift | Valor Lakefront Grand Lake East Room: Speak to the item-giving NPC in the northwestern part of Valor Lakefront Grand Lake East Room, 1 tile west and 5 tiles north of the Valor Lakefront doorway or transition. | NPC (5, 3) | Reach Valor Lakefront Grand Lake East Room and complete the item-giving NPC's one-time dialogue. | script bank 383 |
Hidden Items
| Hidden item | Area / plain-English placement | QA coordinate | Requirement | Source |
|---|---|---|---|---|
| Rare Candy | Valor Lakefront: Use the Dowsing Machine in the southeastern part of Valor Lakefront, 14 tiles east and 4 tiles south of the Valor Lakefront Seven Stars Restaurant doorway or transition and inspect that exact ground tile. | (720, 794) | Found with the Dowsing Machine Pokétch app. See the route notes for any HM, Bicycle, time or story requirement. | Story event |
| Max Ether | Valor Lakefront: Use the Dowsing Machine in the northern part of Valor Lakefront, 1 tile west and 15 tiles north of the Lake Valor Galactic doorway or transition and inspect that exact ground tile. | (716, 745) | Found with the Dowsing Machine Pokétch app. See the route notes for any HM, Bicycle, time or story requirement. | Story event |
Puzzles, Warps, And Switches
- The Suite Key's hidden-item row belongs to the following Route 213 page because its map position is on Route 213 near the hotel reception approach. Use repeated Dowsing taps there, then backtrack to the locked suite.
Completion Checklist
- Complete the currently reachable part of this route plan: Check every hotel room; battle the restaurant's daily trainer pairs before closing time; inspect the Galactic-blocked lake entrance; continue south to Route 213; use the Dowsing Machine near reception there to find the Suite Key, then return it to its owner for the Lava Cookie.
- Review all 10 encounter rows across the per-area tables, including game markers, method band, time-of-day rates, levels, and each conditional requirement; mark conditional rows for their stated revisit.
Route 213
Sweep the beach and cliff paths, visit Dr. Footstep, collect seaside items, and enter Pastoria through the eastern gate.
Source maps
Route 213, Route 213 Pastoria Gatehouse, Route 213 Footstep House, Route 213 Grand Lake Reception, Route 213 Grand Lake East Room, Route 213 Grand Lake West Room, and Route 213 Grand Lake Northeast Room.
Route Plan
Clear beach trainers westward; visit Dr. Footstep for the friendship ribbon check; use Rock Smash on cliff pockets; collect hidden beach items; pass through the Pastoria gate; reserve Surf-only offshore items for later.
- In original Diamond/Pearl, Dr. Footstep awards the Footprint Ribbon at maximum friendship (255). Later games' level-gain or species-group rules do not apply here.
- Shallow water and offshore rocks conceal multiple later Surf pickups, so the first-visit checklist must separate reachable sand from water cleanup.
Encounter tables on this page cover 7 in-game maps.
Wild Pokémon
| Pokémon | Games | Levels | Rate | Requirement / notes | ||
|---|---|---|---|---|---|---|
| Morning | Day | Night | ||||
| Grass / cave floor | ||||||
 Shellos | DP | 20-22 | 40% | 40% | 50% | Rate counts base slots temporarily replaced by the daily swarm and hard-shaking Poké Radar patches. |
| Buizel | DP | 20-21 | 30% | Rate counts base slots temporarily replaced by the daily swarm. | ||
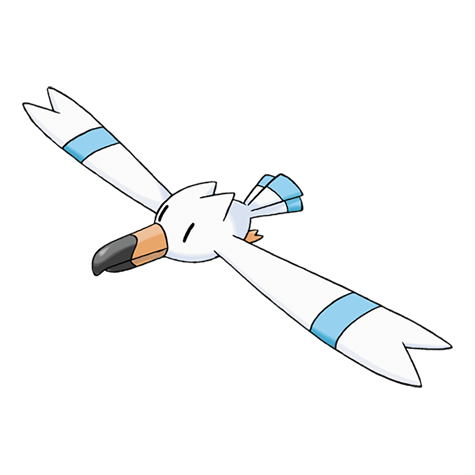 Wingull | DP | 20 | 20% | 20% | 10% | Rate counts base slots temporarily replaced by hard-shaking Poké Radar patches. |
| Floatzel | DP | 22 | 10% | Rate counts base slots temporarily replaced by hard-shaking Poké Radar patches. | ||
| Swarm (post-National Dex daily announcement) | ||||||
 Absol | DP | 20 | 40% | Post-National Dex daily swarm; replaces grass slots 0-1. | ||
| Poké Radar (post-National Dex) | ||||||
 Swellow | DP | 20-22 | 22% | National Dex and Poké Radar required; replacement slot applies only in a hard/vigorous-shaking Radar patch. | ||
| Surfing | ||||||
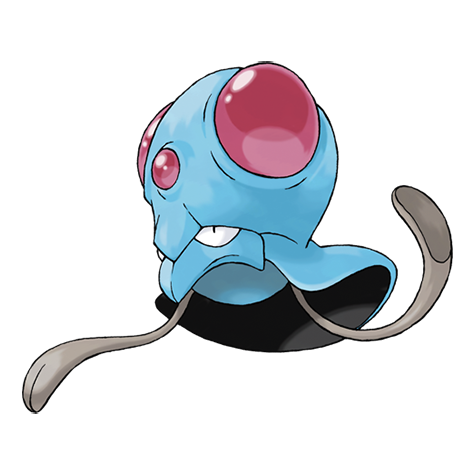 Tentacool | DP | 20-30 | 60% | — | ||
| Wingull | DP | 20-30 | 30% | — | ||
 Pelipper | DP | 20-40 | 5% | — | ||
 Tentacruel | DP | 20-40 | 5% | — | ||
| Fishing — Old Rod | ||||||
| Magikarp | DP | 3-10 | 100% | — | ||
| Fishing — Good Rod | ||||||
| Magikarp | DP | 10-25 | 55% | — | ||
 Remoraid | DP | 10-25 | 45% | — | ||
| Fishing — Super Rod | ||||||
 Octillery | DP | 20-50 | 45% | — | ||
| Gyarados | DP | 30-40 | 40% | — | ||
 Sharpedo | DP | 40-55 | 15% | — | ||
Trainers
| Trainer | Route order / placement | Full team | Reward | Access requirement | Optional / rematch note |
|---|---|---|---|---|---|
 Swimmer Male SheltinSwimmer Male | Route 213 • trainer 1 on this map | ₽496 | Line of sight decides whether you can walk past this trainer. | No Vs. Seeker rematch. | |
| Swimmer Male EvanSwimmer Male | Route 213 • trainer 2 on this map | ₽512 | Line of sight decides whether you can walk past this trainer. | No Vs. Seeker rematch. | |
 Swimmer Female MarySwimmer Female | Route 213 • trainer 3 on this map | ₽480 | Line of sight decides whether you can walk past this trainer. | No Vs. Seeker rematch. | |
| Swimmer Female HaleySwimmer Female | Route 213 • trainer 4 on this map | ₽496 | Line of sight decides whether you can walk past this trainer. | No Vs. Seeker rematch. | |
 Tuber Male JaredTuber Male | Route 213 • trainer 5 on this map | ₽80 | Line of sight decides whether you can walk past this trainer. | Vs. Seeker rematch levels: Lv. 28/Lv. 27/Lv. 29; Lv. 52/Lv. 53/Lv. 51. | |
 Tuber Female ChelseaTuber Female | Route 213 • trainer 6 on this map |
| ₽92 | Line of sight decides whether you can walk past this trainer. | Vs. Seeker rematch levels: Lv. 40; Lv. 55. |
| Beauty CyndyBeauty | Route 213 • trainer 7 on this map | ₽1,288 | Line of sight decides whether you can walk past this trainer. | Vs. Seeker rematch levels: Lv. 40; Lv. 60. | |
 Fisherman KennethFisherman | Route 213 • trainer 8 on this map | ₽704 | Line of sight decides whether you can walk past this trainer. | No Vs. Seeker rematch. | |
 Sailor PaulSailor | Route 213 • trainer 9 on this map | ₽992 | Line of sight decides whether you can walk past this trainer. | No Vs. Seeker rematch. |

Items
| Item | Version | Type | Area / exact direction | Map position | Requirement | Source |
|---|---|---|---|---|---|---|
| TM40 | Diamond / Pearl | Visible item ball | Route 213: Pick up the item ball in the central part of Route 213, 14 tiles east and 3 tiles north of the Route 213 Footstep House doorway or transition. | (677, 831) | See the route notes for any HM, Bicycle, time or story requirement. | Story event |
| Red Shard | Diamond / Pearl | Visible item ball | Route 213: Pick up the item ball in the northern part of Route 213, 6 tiles west of the Route 213 Grand Lake Reception doorway or transition. | (700, 818) | See the route notes for any HM, Bicycle, time or story requirement. | Story event |
| Max Revive | Diamond / Pearl | Visible item ball | Route 213: Pick up the item ball in the southern part of Route 213, 23 tiles east and 17 tiles south of the Route 213 Footstep House doorway or transition. | (686, 851) | See the route notes for any HM, Bicycle, time or story requirement. | Story event |
| Water Stone | Diamond / Pearl | Visible item ball | Route 213: Pick up the item ball in the eastern part of Route 213, 20 tiles east and 19 tiles south of the Route 213 Grand Lake Reception doorway or transition. | (726, 837) | See the route notes for any HM, Bicycle, time or story requirement. | Story event |
| TM05 | Diamond / Pearl | Visible item ball | Route 213: Pick up the item ball in the central part of Route 213, 17 tiles west and 8 tiles south of the Route 213 Grand Lake Reception doorway or transition. | (689, 826) | See the route notes for any HM, Bicycle, time or story requirement. | Story event |
| PP Up | Diamond / Pearl | Visible item ball | Route 213: Pick up the item ball in the northern part of Route 213, 11 tiles west and 6 tiles south of the Route 213 Grand Lake West Room doorway or transition. | (690, 811) | See the route notes for any HM, Bicycle, time or story requirement. | Story event |
| Protein | Diamond / Pearl | Visible item ball | Route 213: Pick up the item ball in the northeastern part of Route 213, 7 tiles east and 3 tiles south of the Route 213 Grand Lake East Room doorway or transition. | (717, 813) | See the route notes for any HM, Bicycle, time or story requirement. | Story event |
| Aguav Berry | Diamond / Pearl | Berry tree | Route 213: Harvest berry patch 62 in the northwestern part of Route 213, 10 tiles east and 4 tiles north of the Route 213 Pastoria Gatehouse doorway or transition. The plot can be replanted after the initial harvest. | (656, 808) | Reach the outdoor patch on the named route or town; harvest its initial berries before planting a replacement. | berry table ov52_021D76F8, patch 62 |
| Rawst Berry | Diamond / Pearl | Berry tree | Route 213: Harvest berry patch 64 in the northwestern part of Route 213, 11 tiles east and 4 tiles north of the Route 213 Pastoria Gatehouse doorway or transition. The plot can be replanted after the initial harvest. | (657, 808) | Reach the outdoor patch on the named route or town; harvest its initial berries before planting a replacement. | berry table ov52_021D76F8, patch 64 |
| Rawst Berry | Diamond / Pearl | Berry tree | Route 213: Harvest berry patch 65 in the northwestern part of Route 213, 12 tiles east and 4 tiles north of the Route 213 Pastoria Gatehouse doorway or transition. The plot can be replanted after the initial harvest. | (658, 808) | Reach the outdoor patch on the named route or town; harvest its initial berries before planting a replacement. | berry table ov52_021D76F8, patch 65 |
| Iapapa Berry | Diamond / Pearl | Berry tree | Route 213: Harvest berry patch 63 in the northwestern part of Route 213, 13 tiles east and 4 tiles north of the Route 213 Pastoria Gatehouse doorway or transition. The plot can be replanted after the initial harvest. | (659, 808) | Reach the outdoor patch on the named route or town; harvest its initial berries before planting a replacement. | berry table ov52_021D76F8, patch 63 |
| TM92 | Diamond / Pearl | NPC / scripted gift | Route 213 Grand Lake West Room: Speak to the item-giving NPC in the northwestern part of Route 213 Grand Lake West Room, 4 tiles west and 5 tiles north of the Route 213 doorway or transition. | NPC (2, 3) | Reach Route 213 Grand Lake West Room and complete the item-giving NPC's one-time dialogue. | script bank 429 |
Hidden Items
| Hidden item | Area / plain-English placement | QA coordinate | Requirement | Source |
|---|---|---|---|---|
| Max Revive | Route 213: Use the Dowsing Machine in the northern part of Route 213, 15 tiles west and 1 tile south of the Route 213 Grand Lake Reception doorway or transition and inspect that exact ground tile. | (691, 819) | Found with the Dowsing Machine Pokétch app. See the route notes for any HM, Bicycle, time or story requirement. | Story event |
| Big Pearl | Route 213: Use the Dowsing Machine in the southeastern part of Route 213, 16 tiles east and 38 tiles south of the Route 213 Grand Lake Reception doorway or transition and inspect that exact ground tile. | (722, 856) | Found with the Dowsing Machine Pokétch app. See the route notes for any HM, Bicycle, time or story requirement. | Story event |
| Pearl | Route 213: Use the Dowsing Machine in the southwestern part of Route 213, 3 tiles east and 9 tiles south of the Route 213 Footstep House doorway or transition and inspect that exact ground tile. | (666, 843) | Found with the Dowsing Machine Pokétch app. See the route notes for any HM, Bicycle, time or story requirement. | Story event |
| Awakening | Route 213: Use the Dowsing Machine in the western part of Route 213, 4 tiles east and 13 tiles south of the Route 213 Pastoria Gatehouse doorway or transition and inspect that exact ground tile. | (650, 826) | Found with the Dowsing Machine Pokétch app. See the route notes for any HM, Bicycle, time or story requirement. | Story event |
| Pearl | Route 213: Use the Dowsing Machine in the southern part of Route 213, 28 tiles east and 10 tiles south of the Route 213 Footstep House doorway or transition and inspect that exact ground tile. | (691, 844) | Found with the Dowsing Machine Pokétch app. See the route notes for any HM, Bicycle, time or story requirement. | Story event |
| Pearl | Route 213: Use the Dowsing Machine in the southern part of Route 213, 15 tiles east and 12 tiles south of the Route 213 Footstep House doorway or transition and inspect that exact ground tile. | (678, 846) | Found with the Dowsing Machine Pokétch app. See the route notes for any HM, Bicycle, time or story requirement. | Story event |
| Hyper Potion | Route 213: Use the Dowsing Machine in the northern part of Route 213, 9 tiles west and 4 tiles north of the Route 213 Grand Lake West Room doorway or transition and inspect that exact ground tile. | (692, 801) | Found with the Dowsing Machine Pokétch app. See the route notes for any HM, Bicycle, time or story requirement. | Story event |
| Great Ball | Route 213: Use the Dowsing Machine in the eastern part of Route 213, 7 tiles east and 11 tiles south of the Route 213 Grand Lake Reception doorway or transition and inspect that exact ground tile. | (713, 829) | Found with the Dowsing Machine Pokétch app. See the route notes for any HM, Bicycle, time or story requirement. | Story event |
| Calcium | Route 213: Use the Dowsing Machine in the eastern part of Route 213, 4 tiles west and 11 tiles south of the Route 213 Grand Lake Reception doorway or transition and inspect that exact ground tile. | (702, 829) | Found with the Dowsing Machine Pokétch app. See the route notes for any HM, Bicycle, time or story requirement. | Story event |
| Super Potion | Route 213: Use the Dowsing Machine in the eastern part of Route 213, 4 tiles east and 8 tiles south of the Route 213 Grand Lake Reception doorway or transition and inspect that exact ground tile. | (710, 826) | Found with the Dowsing Machine Pokétch app. See the route notes for any HM, Bicycle, time or story requirement. | Story event |
| Suite Key | Route 213: Use the Dowsing Machine in the northeastern part of Route 213, 1 tile west and 1 tile north of the Route 213 Grand Lake Reception doorway or transition and inspect that exact ground tile. | (705, 812) | Found with the Dowsing Machine Pokétch app. See the route notes for any HM, Bicycle, time or story requirement. | Story event |
| Max Revive | Route 213 Grand Lake Northeast Room: Use the Dowsing Machine in the eastern part of Route 213 Grand Lake Northeast Room, 3 tiles east and 2 tiles north of the Route 213 doorway or transition and inspect that exact ground tile. | (9, 6) | Found with the Dowsing Machine Pokétch app. See the route notes for any HM, Bicycle, time or story requirement. | Story event |
Puzzles, Warps, And Switches
- Take the upper rock path and lower beach as separate loops. Rock Smash opens shortcuts but does not replace the later Surf route around the exterior rocks.
Completion Checklist
- Complete the currently reachable part of this route plan: Clear beach trainers westward; visit Dr. Footstep for the friendship ribbon check; use Rock Smash on cliff pockets; collect hidden beach items; pass through the Pastoria gate; reserve Surf-only offshore items for later.
- Review all 16 encounter rows across the per-area tables, including game markers, method band, time-of-day rates, levels, and each conditional requirement; mark conditional rows for their stated revisit.
Pastoria City, Great Marsh, and Barry
Tour Pastoria, receive HM05 Defog in the Great Marsh, sample rotating Safari encounters, and defeat Barry at the Gym entrance.
Source maps
Pastoria, Pastoria Poké Mart, Pastoria Pokémon Center, Pastoria Pokémon Center 2F, Pastoria Great Marsh Entrance 1F, Pastoria Great Marsh Entrance 2F, Pastoria Southwest House, Pastoria West House, Pastoria Move Tutor House, Pastoria Northwest House, Pastoria Scarf Guy House, Great Marsh Unused, Great Marsh, Pastoria Pokémon Center B1F, Great Marsh Area 1, and Great Marsh Area 2, and 4 more submaps.
Route Plan
Heal and restock; visit the Move Reminder and scarf house; inspect the Great Marsh binoculars; enter once and collect HM05 immediately; sweep all six areas for items and desired catches; save before approaching the Gym; defeat Barry.
- The upstairs binoculars show five random area-and-slot samples with replacement from the day's effective grass tables. A preview can show ordinary species as well as the daily replacement, so it helps locate a target but does not guarantee that every daily special appears.
- Great Marsh uses a step limit and 30 Safari Balls; mud and bait alter catch and flee behavior but cannot guarantee a rare catch.
- Pastoria's Move Reminder reteaches an eligible level-up move for one Heart Scale per move. This is a paid repeatable service, not a one-time free tutor.
Encounter tables on this page cover 20 in-game maps.
Great Marsh Area 1
| Pokémon | Games | Levels | Rate | Requirement / notes | ||
|---|---|---|---|---|---|---|
| Morning | Day | Night | ||||
| Grass / cave floor | ||||||
| Bibarel | DP | 25 | 20% | — | ||
 Wooper | DP | 24 | 20% | — | ||
 Marill | DP | 25 | 10% | — | ||
| Quagsire | DP | 25 | 10% | — | ||
 Budew | DP | 24 | 10% | 10% | — | — |
| Starly | DP | 26 | 10% | 10% | — | — |
 Hoothoot | DP | 24 | — | — | 10% | — |
 Noctowl | DP | 26 | — | — | 10% | — |
| Psyduck | DP | 24 or 26 | 8% | Rate counts base slots temporarily replaced by GBA dual-slot insertions. | ||
 Azurill | DP | 24 | 1% | — | ||
 Bidoof | DP | 26 | 1% | — | ||
| Dual-slot GBA insertion (post-National Dex) | ||||||
 Arbok | DP | 24 or 26 | 8% | National Dex plus Pokémon FireRed inserted in the Nintendo DS GBA slot; replaces grass slots 8-9. | ||
| Surfing | ||||||
| Wooper | DP | 20-30 | 60% | — | ||
| Marill | DP | 20-30 | 30% | — | ||
| Psyduck | DP | 20-40 | 5% | — | ||
| Quagsire | DP | 20-40 | 5% | — | ||
| Fishing — Old Rod | ||||||
| Magikarp | DP | 3-10 | 100% | — | ||
| Fishing — Good Rod | ||||||
| Magikarp | DP | 10-25 | 55% | — | ||
 Barboach | DP | 15-20 | 40% | — | ||
| Gyarados | DP | 15-30 | 5% | — | ||
| Fishing — Super Rod | ||||||
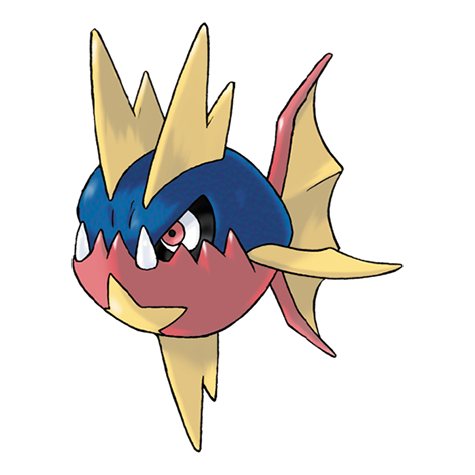 Carvanha | DP | 15-30 | 45% | — | ||
 Whiscash | DP | 30-55 | 40% | — | ||
| Gyarados | DP | 40-55 | 15% | — | ||
Great Marsh Area 2
| Pokémon | Games | Levels | Rate | Requirement / notes | ||
|---|---|---|---|---|---|---|
| Morning | Day | Night | ||||
| Grass / cave floor | ||||||
| Bibarel | DP | 25 | 20% | — | ||
| Wooper | DP | 24 | 20% | — | ||
| Marill | DP | 25 | 10% | — | ||
| Quagsire | DP | 25 | 10% | — | ||
| Budew | DP | 24 | 10% | 10% | — | — |
| Starly | DP | 26 | 10% | 10% | — | — |
| Hoothoot | DP | 24 | — | — | 10% | — |
| Noctowl | DP | 26 | — | — | 10% | — |
| Psyduck | DP | 24 or 26 | 8% | Rate counts base slots temporarily replaced by GBA dual-slot insertions. | ||
| Azurill | DP | 24 | 1% | — | ||
| Bidoof | DP | 26 | 1% | — | ||
| Dual-slot GBA insertion (post-National Dex) | ||||||
| Arbok | DP | 24 or 26 | 8% | National Dex plus Pokémon FireRed inserted in the Nintendo DS GBA slot; replaces grass slots 8-9. | ||
| Surfing | ||||||
| Wooper | DP | 20-30 | 60% | — | ||
| Marill | DP | 20-30 | 30% | — | ||
| Psyduck | DP | 20-40 | 5% | — | ||
| Quagsire | DP | 20-40 | 5% | — | ||
| Fishing — Old Rod | ||||||
| Magikarp | DP | 3-10 | 100% | — | ||
| Fishing — Good Rod | ||||||
| Magikarp | DP | 10-25 | 55% | — | ||
| Barboach | DP | 15-20 | 40% | — | ||
| Gyarados | DP | 15-30 | 5% | — | ||
| Fishing — Super Rod | ||||||
| Carvanha | DP | 15-30 | 45% | — | ||
| Whiscash | DP | 30-55 | 40% | — | ||
| Gyarados | DP | 40-55 | 15% | — | ||
Great Marsh Area 3
| Pokémon | Games | Levels | Rate | Requirement / notes | ||
|---|---|---|---|---|---|---|
| Morning | Day | Night | ||||
| Grass / cave floor | ||||||
| Bibarel | DP | 23 | 20% | — | ||
| Wooper | DP | 22 | 20% | — | ||
| Hoothoot | DP | 22 or 24 | — | — | 20% | — |
| Marill | DP | 23 | 10% | — | ||
| Quagsire | DP | 23 | 10% | — | ||
| Budew | DP | 22 | 10% | 10% | — | — |
| Starly | DP | 24 | 10% | 10% | — | — |
| Psyduck | DP | 22 or 24 | 8% | Rate counts base slots temporarily replaced by GBA dual-slot insertions. | ||
| Azurill | DP | 22 | 1% | — | ||
| Bidoof | DP | 24 | 1% | — | ||
| Dual-slot GBA insertion (post-National Dex) | ||||||
| Arbok | DP | 22 or 24 | 8% | National Dex plus Pokémon FireRed inserted in the Nintendo DS GBA slot; replaces grass slots 8-9. | ||
| Surfing | ||||||
| Wooper | DP | 20-30 | 60% | — | ||
| Marill | DP | 20-30 | 30% | — | ||
| Psyduck | DP | 20-40 | 5% | — | ||
| Quagsire | DP | 20-40 | 5% | — | ||
| Fishing — Old Rod | ||||||
| Magikarp | DP | 3-10 | 100% | — | ||
| Fishing — Good Rod | ||||||
| Magikarp | DP | 10-25 | 55% | — | ||
| Barboach | DP | 15-20 | 40% | — | ||
| Gyarados | DP | 15-30 | 5% | — | ||
| Fishing — Super Rod | ||||||
| Carvanha | DP | 15-30 | 45% | — | ||
| Whiscash | DP | 30-55 | 40% | — | ||
| Gyarados | DP | 40-55 | 15% | — | ||
Great Marsh Area 4
| Pokémon | Games | Levels | Rate | Requirement / notes | ||
|---|---|---|---|---|---|---|
| Morning | Day | Night | ||||
| Grass / cave floor | ||||||
| Bibarel | DP | 23 | 20% | — | ||
| Wooper | DP | 22 | 20% | — | ||
| Hoothoot | DP | 22 or 24 | — | — | 20% | — |
| Marill | DP | 23 | 10% | — | ||
| Quagsire | DP | 23 | 10% | — | ||
| Budew | DP | 22 | 10% | 10% | — | — |
| Starly | DP | 24 | 10% | 10% | — | — |
| Psyduck | DP | 22 or 24 | 8% | Rate counts base slots temporarily replaced by GBA dual-slot insertions. | ||
| Azurill | DP | 22 | 1% | — | ||
| Bidoof | DP | 24 | 1% | — | ||
| Dual-slot GBA insertion (post-National Dex) | ||||||
| Arbok | DP | 22 or 24 | 8% | National Dex plus Pokémon FireRed inserted in the Nintendo DS GBA slot; replaces grass slots 8-9. | ||
| Surfing | ||||||
| Wooper | DP | 20-30 | 60% | — | ||
| Marill | DP | 20-30 | 30% | — | ||
| Psyduck | DP | 20-40 | 5% | — | ||
| Quagsire | DP | 20-40 | 5% | — | ||
| Fishing — Old Rod | ||||||
| Magikarp | DP | 3-10 | 100% | — | ||
| Fishing — Good Rod | ||||||
| Magikarp | DP | 10-25 | 55% | — | ||
| Barboach | DP | 15-20 | 40% | — | ||
| Gyarados | DP | 15-30 | 5% | — | ||
| Fishing — Super Rod | ||||||
| Carvanha | DP | 15-30 | 45% | — | ||
| Whiscash | DP | 30-55 | 40% | — | ||
| Gyarados | DP | 40-55 | 15% | — | ||
Great Marsh Area 5
| Pokémon | Games | Levels | Rate | Requirement / notes | ||
|---|---|---|---|---|---|---|
| Morning | Day | Night | ||||
| Grass / cave floor | ||||||
| Bibarel | DP | 21 | 20% | — | ||
| Wooper | DP | 20 | 20% | — | ||
| Hoothoot | DP | 20 or 22 | — | — | 20% | — |
| Marill | DP | 21 | 10% | — | ||
| Quagsire | DP | 21 | 10% | — | ||
| Budew | DP | 20 | 10% | 10% | — | — |
| Starly | DP | 22 | 10% | 10% | — | — |
| Azurill | DP | 20 | 5% | Rate counts base slots temporarily replaced by GBA dual-slot insertions. | ||
| Bidoof | DP | 22 | 5% | Rate counts base slots temporarily replaced by GBA dual-slot insertions. | ||
| Dual-slot GBA insertion (post-National Dex) | ||||||
| Arbok | DP | 20 or 22 | 8% | National Dex plus Pokémon FireRed inserted in the Nintendo DS GBA slot; replaces grass slots 8-9. | ||
Great Marsh Area 6
| Pokémon | Games | Levels | Rate | Requirement / notes | ||
|---|---|---|---|---|---|---|
| Morning | Day | Night | ||||
| Grass / cave floor | ||||||
| Bibarel | DP | 21 | 20% | — | ||
| Wooper | DP | 20 | 20% | — | ||
| Hoothoot | DP | 20 or 22 | — | — | 20% | — |
| Marill | DP | 21 | 10% | — | ||
| Quagsire | DP | 21 | 10% | — | ||
| Budew | DP | 20 | 10% | 10% | — | — |
| Starly | DP | 22 | 10% | 10% | — | — |
| Psyduck | DP | 20 or 22 | 8% | Rate counts base slots temporarily replaced by GBA dual-slot insertions. | ||
| Azurill | DP | 20 | 1% | — | ||
| Bidoof | DP | 22 | 1% | — | ||
| Dual-slot GBA insertion (post-National Dex) | ||||||
| Arbok | DP | 20 or 22 | 8% | National Dex plus Pokémon FireRed inserted in the Nintendo DS GBA slot; replaces grass slots 8-9. | ||
| Surfing | ||||||
| Wooper | DP | 20-30 | 60% | — | ||
| Marill | DP | 20-30 | 30% | — | ||
| Psyduck | DP | 20-40 | 5% | — | ||
| Quagsire | DP | 20-40 | 5% | — | ||
| Fishing — Old Rod | ||||||
| Magikarp | DP | 3-10 | 100% | — | ||
| Fishing — Good Rod | ||||||
| Magikarp | DP | 10-25 | 55% | — | ||
| Barboach | DP | 15-20 | 40% | — | ||
| Gyarados | DP | 15-30 | 5% | — | ||
| Fishing — Super Rod | ||||||
| Carvanha | DP | 15-30 | 45% | — | ||
| Whiscash | DP | 30-55 | 40% | — | ||
| Gyarados | DP | 40-55 | 15% | — | ||
Pastoria
| Pokémon | Games | Levels | Rate | Requirement / notes | ||
|---|---|---|---|---|---|---|
| Morning | Day | Night | ||||
| Surfing | ||||||
| Tentacool | DP | 20-30 | 60% | — | ||
| Wingull | DP | 20-30 | 30% | — | ||
| Pelipper | DP | 20-40 | 5% | — | ||
| Tentacruel | DP | 20-40 | 5% | — | ||
| Fishing — Old Rod | ||||||
| Magikarp | DP | 3-10 | 100% | — | ||
| Fishing — Good Rod | ||||||
| Magikarp | DP | 10-25 | 55% | — | ||
| Remoraid | DP | 10-25 | 45% | — | ||
| Fishing — Super Rod | ||||||
| Gyarados | DP | 30-55 | 55% | — | ||
| Octillery | DP | 20-50 | 45% | — | ||
Pastoria City, Great Marsh, and Barry
| Pokémon | Games | Levels | Rate | Requirement / notes | ||
|---|---|---|---|---|---|---|
| Morning | Day | Night | ||||
| Great Marsh daily replacement | ||||||
 Croagunk | DP | 22 / 24 / 26 by area | 10% while selected; 15.625% daily selection | Pre- or post-National Dex; one saved daily choice per area Replaces grass slots 6-7. Areas 1-2 use Lv. 26, 3-4 Lv. 24, and 5-6 Lv. 22. | ||
 Skorupi | DP | 22 / 24 / 26 by area | 10% while selected; 15.625% daily selection | Pre- or post-National Dex; one saved daily choice per area Five of 32 selection entries; replaces grass slots 6-7. | ||
 Carnivine | DP | 22 / 24 / 26 by area | 10% while selected; 15.625% daily selection | Pre- or post-National Dex; one saved daily choice per area Five of 32 selection entries; replaces grass slots 6-7. | ||
| Golduck | DP | 22 / 24 / 26 by area | 10% while selected; 9.375% daily selection | Pre- or post-National Dex; one saved daily choice per area Three of 32 selection entries; replaces grass slots 6-7. | ||
| Roselia | DP | 22 / 24 / 26 by area | 10% while selected; 9.375% daily selection | Pre- or post-National Dex; one saved daily choice per area Three of 32 selection entries; replaces grass slots 6-7. | ||
| Staravia | DP | 22 / 24 / 26 by area | 10% while selected; 9.375% daily selection | Pre- or post-National Dex; one saved daily choice per area Three of 32 selection entries; replaces grass slots 6-7. | ||
| Azurill | DP | 22 / 24 / 26 by area | 10% while selected; 6.25% daily selection | Before the National Dex Two of 32 pre-National-Dex selection entries; replaces grass slots 6-7. | ||
| Wooper | DP | 22 / 24 / 26 by area | 10% while selected; 6.25% daily selection | Before the National Dex Two of 32 pre-National-Dex selection entries; replaces grass slots 6-7. | ||
| Marill | DP | 22 / 24 / 26 by area | 10% while selected; 3.125% daily selection | Before the National Dex One of 32 pre-National-Dex selection entries; replaces grass slots 6-7. | ||
| Quagsire | DP | 22 / 24 / 26 by area | 10% while selected; 3.125% daily selection | Before the National Dex One of 32 pre-National-Dex selection entries; replaces grass slots 6-7. | ||
| Bidoof | DP | 22 / 24 / 26 by area | 10% while selected; 3.125% daily selection | Before the National Dex One of 32 pre-National-Dex selection entries; replaces grass slots 6-7. | ||
| Bibarel | DP | 22 / 24 / 26 by area | 10% while selected; 3.125% daily selection | Before the National Dex One of 32 pre-National-Dex selection entries; replaces grass slots 6-7. | ||
 Toxicroak | DP | 22 / 24 / 26 by area | 10% while selected; 3.125% daily selection | National Dex obtained One of 32 post-National-Dex selection entries; replaces grass slots 6-7. | ||
 Drapion | DP | 22 / 24 / 26 by area | 10% while selected; 3.125% daily selection | National Dex obtained One of 32 post-National-Dex selection entries; replaces grass slots 6-7. | ||
 Exeggcute | DP | 22 / 24 / 26 by area | 10% while selected; 3.125% daily selection | National Dex obtained One of 32 post-National-Dex selection entries; replaces grass slots 6-7. | ||
 Yanma | DP | 22 / 24 / 26 by area | 10% while selected; 3.125% daily selection | National Dex obtained One of 32 post-National-Dex selection entries; replaces grass slots 6-7. | ||
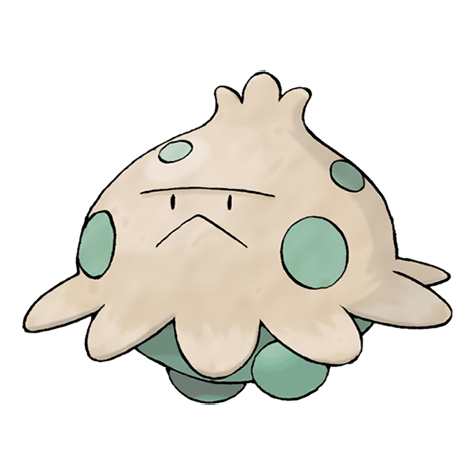 Shroomish | DP | 22 / 24 / 26 by area | 10% while selected; 3.125% daily selection | National Dex obtained One of 32 post-National-Dex selection entries; replaces grass slots 6-7. | ||
 Paras | DP | 22 / 24 / 26 by area | 10% while selected; 3.125% daily selection | National Dex obtained One of 32 post-National-Dex selection entries; replaces grass slots 6-7. | ||
 Kangaskhan | DP | 22 / 24 / 26 by area | 10% while selected; 3.125% daily selection | National Dex obtained One of 32 post-National-Dex selection entries; replaces grass slots 6-7. | ||
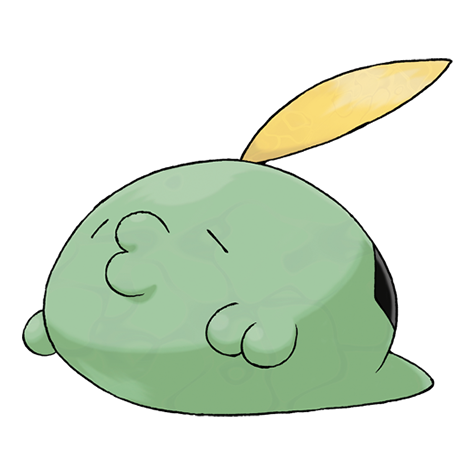 Gulpin | DP | 22 / 24 / 26 by area | 10% while selected; 3.125% daily selection | National Dex obtained One of 32 post-National-Dex selection entries; replaces grass slots 6-7. | ||
Trainers
| Trainer | Route order / placement | Full team | Reward | Access requirement | Optional / rematch note |
|---|---|---|---|---|---|
| Pokémon Trainer BarryPokémon Trainer Barry | Pastoria • scripted | ₽2,800 | Scripted story trigger; complete the local objective described in the route plan. | Major or story battle; not a VS Seeker rematch row. | |
| Pokémon Trainer BarryPokémon Trainer Barry | Pastoria • scripted | ₽2,800 | Scripted story trigger; complete the local objective described in the route plan. | Major or story battle; not a VS Seeker rematch row. | |
| Pokémon Trainer BarryPokémon Trainer Barry | Pastoria • scripted | ₽2,800 | Scripted story trigger; complete the local objective described in the route plan. | Major or story battle; not a VS Seeker rematch row. |
Items
| Item | Version | Type | Area / exact direction | Map position | Requirement | Source |
|---|---|---|---|---|---|---|
| Mystic Water | Diamond / Pearl | Visible item ball | Pastoria: Pick up the item ball in the eastern part of Pastoria, 1 tile east and 10 tiles south of the Pastoria Scarf Guy House doorway or transition. | (625, 829) | See the route notes for any HM, Bicycle, time or story requirement. | Story event |
| Super Repel | Diamond / Pearl | Visible item ball | Great Marsh Area 1: Pick up the item ball in the northern part of Great Marsh Area 1, 10 tiles west and 6 tiles north of the nearest sign or interactable landmark. | (52, 32) | See the route notes for any HM, Bicycle, time or story requirement. | Story event |
| Potion | Diamond / Pearl | Visible item ball | Great Marsh Area 1: Pick up the item ball in the central part of Great Marsh Area 1, 7 tiles west and 1 tile south of the nearest visible NPC. | (54, 49) | See the route notes for any HM, Bicycle, time or story requirement. | Story event |
| Great Ball | Diamond / Pearl | Visible item ball | Great Marsh Area 2: Pick up the item ball in the northern part of Great Marsh Area 2, 7 tiles east and 2 tiles north of the nearest sign or interactable landmark. | (76, 36) | See the route notes for any HM, Bicycle, time or story requirement. | Story event |
| Honey | Diamond / Pearl | Visible item ball | Great Marsh Area 3: Pick up the item ball in the western part of Great Marsh Area 3, 1 tile east and 4 tiles north of the nearest visible NPC. | (35, 71) | See the route notes for any HM, Bicycle, time or story requirement. | Story event |
| Poké Ball | Diamond / Pearl | Visible item ball | Great Marsh Area 4: Pick up the item ball in the northern part of Great Marsh Area 4, 2 tiles west and 7 tiles north of the nearest visible NPC. | (75, 71) | See the route notes for any HM, Bicycle, time or story requirement. | Story event |
| Super Potion | Diamond / Pearl | Visible item ball | Great Marsh Area 4: Pick up the item ball in the eastern part of Great Marsh Area 4, 3 tiles west and 2 tiles north of the nearest sign or interactable landmark. | (90, 77) | See the route notes for any HM, Bicycle, time or story requirement. | Story event |
| Antidote | Diamond / Pearl | Visible item ball | Great Marsh Area 5: Pick up the item ball in the southwestern part of Great Marsh Area 5, 7 tiles east and 4 tiles south of the nearest sign or interactable landmark. | (48, 112) | See the route notes for any HM, Bicycle, time or story requirement. | Story event |
| Parlyz Heal | Diamond / Pearl | Visible item ball | Great Marsh Area 6: Pick up the item ball in the eastern part of Great Marsh Area 6, 22 tiles east and 12 tiles north of the Pastoria Great Marsh Entrance 1F doorway or transition. | (91, 105) | See the route notes for any HM, Bicycle, time or story requirement. | Story event |
| Persim Berry | Diamond / Pearl | Berry tree | Pastoria: Harvest berry patch 58 in the central part of Pastoria, 3 tiles west and 7 tiles north of the Pastoria Move Tutor House doorway or transition. The plot can be replanted after the initial harvest. | (608, 828) | Reach the outdoor patch on the named route or town; harvest its initial berries before planting a replacement. | berry table ov52_021D76F8, patch 58 |
| Persim Berry | Diamond / Pearl | Berry tree | Pastoria: Harvest berry patch 59 in the central part of Pastoria, 7 tiles north of the Pastoria Move Tutor House doorway or transition. The plot can be replanted after the initial harvest. | (611, 828) | Reach the outdoor patch on the named route or town; harvest its initial berries before planting a replacement. | berry table ov52_021D76F8, patch 59 |
| Nanab Berry | Diamond / Pearl | Berry tree | Pastoria: Harvest berry patch 60 in the central part of Pastoria, 2 tiles west and 7 tiles north of the Pastoria Move Tutor House doorway or transition. The plot can be replanted after the initial harvest. | (609, 828) | Reach the outdoor patch on the named route or town; harvest its initial berries before planting a replacement. | berry table ov52_021D76F8, patch 60 |
| Nanab Berry | Diamond / Pearl | Berry tree | Pastoria: Harvest berry patch 61 in the central part of Pastoria, 1 tile west and 7 tiles north of the Pastoria Move Tutor House doorway or transition. The plot can be replanted after the initial harvest. | (610, 828) | Reach the outdoor patch on the named route or town; harvest its initial berries before planting a replacement. | berry table ov52_021D76F8, patch 61 |
| Macho Brace | Diamond / Pearl | NPC / scripted gift | Pastoria West House: Show the Pastoria collector all three Burmy cloak forms to receive the Macho Brace. | NPC (5, 5) | Carry Plant Cloak, Sandy Cloak, and Trash Cloak Burmy simultaneously in the party; Pokedex registration alone does not satisfy the check. | script bank 127 |
| Red Scarf | Diamond / Pearl | NPC / scripted gift | Pastoria Scarf Guy House: Show the Scarf Guy a Pokemon with at least 200 Cool condition. | NPC (5, 5) | Lead with a Pokemon at 200 or more Cool Contest condition; one-time gift. | script bank 130 |
| Blue Scarf | Diamond / Pearl | NPC / scripted gift | Pastoria Scarf Guy House: Show the Scarf Guy a Pokemon with at least 200 Beauty condition. | NPC (5, 5) | Lead with a Pokemon at 200 or more Beauty Contest condition; one-time gift. | script bank 130 |
| Pink Scarf | Diamond / Pearl | NPC / scripted gift | Pastoria Scarf Guy House: Show the Scarf Guy a Pokemon with at least 200 Cute condition. | NPC (5, 5) | Lead with a Pokemon at 200 or more Cute Contest condition; one-time gift. | script bank 130 |
| Green Scarf | Diamond / Pearl | NPC / scripted gift | Pastoria Scarf Guy House: Show the Scarf Guy a Pokemon with at least 200 Smart condition. | NPC (5, 5) | Lead with a Pokemon at 200 or more Smart Contest condition; one-time gift. | script bank 130 |
| Yellow Scarf | Diamond / Pearl | NPC / scripted gift | Pastoria Scarf Guy House: Show the Scarf Guy a Pokemon with at least 200 Tough condition. | NPC (5, 5) | Lead with a Pokemon at 200 or more Tough Contest condition; one-time gift. | script bank 130 |
| HM05 Defog | Diamond / Pearl | Gift | Pastoria City, Great Marsh, and Barry: Given by the green-haired attendant immediately inside the Great Marsh; field use requires the Fen Badge. | NPC | See the route plan. | editorial script/system note |
| Move Reminder service | Diamond / Pearl | Repeatable move relearning | Pastoria City, Great Marsh, and Barry: The Pastoria Move Reminder reteaches one eligible level-up move per payment. | NPC | Pay 1 Heart Scale for each move relearned. | editorial script/system note |
| Daily resistance Berry (Occa through Chilan pool) | Diamond / Pearl | Daily random gift | Pastoria City, Great Marsh, and Barry: The southwest Pastoria house randomly gives one of the 17 type-resistance Berries from Occa through Chilan. | NPC | Once per day; speak to the Berry-giving NPC in Pastoria's southwest house. | editorial script/system note |
Hidden Items
| Hidden item | Area / plain-English placement | QA coordinate | Requirement | Source |
|---|---|---|---|---|
| Full Heal | Pastoria: Use the Dowsing Machine in the southwestern part of Pastoria, 6 tiles west and 13 tiles south of the Pastoria Southwest House doorway or transition and inspect that exact ground tile. | (583, 857) | Found with the Dowsing Machine Pokétch app. See the route notes for any HM, Bicycle, time or story requirement. | Story event |
| Rare Candy | Great Marsh Area 1: Use the Dowsing Machine in Area 1's northwest grass pocket, west of the internal rail line. | (34, 38) | Dowsing Machine Pokétch app. Pay the Great Marsh entry fee and reach Area 1 within the 500-step limit. | Story event |
| Toxic Plate | Great Marsh Area 2: Use the Dowsing Machine in Area 2's northeast grass pocket, east of the internal rail line. | (86, 35) | Dowsing Machine Pokétch app. Pay the Great Marsh entry fee and reach Area 2 within the 500-step limit. | Story event |
| Ultra Ball | Great Marsh Area 3: Use the Dowsing Machine in Area 3's northwest muddy-grass pocket beside the raised path. | (47, 79) | Dowsing Machine Pokétch app. Pay the Great Marsh entry fee and reach Area 3 within the 500-step limit. | Story event |
| Nugget | Great Marsh Area 4: Use the Dowsing Machine in Area 4's northeast muddy-grass pocket beside the raised path. | (93, 79) | Dowsing Machine Pokétch app. Pay the Great Marsh entry fee and reach Area 4 within the 500-step limit. | Story event |
| Full Heal | Great Marsh Area 5: Use the Dowsing Machine in Area 5's southwest grass near the southern connecting path. | (41, 108) | Dowsing Machine Pokétch app. Pay the Great Marsh entry fee and reach Area 5 within the 500-step limit. | Story event |
| Hyper Potion | Great Marsh Area 6: Use the Dowsing Machine in the eastern part of Great Marsh Area 6, 22 tiles east and 10 tiles north of the Pastoria Great Marsh Entrance 1F doorway or transition and inspect that exact ground tile. | (91, 107) | Found with the Dowsing Machine Pokétch app. See the route notes for any HM, Bicycle, time or story requirement. | Story event |
Puzzles, Warps, And Switches
- Use the tram to reach Areas 1 and 2 cheaply, then work south through Areas 3-6. Pick up HM05 from the first attendant inside before spending the visit on encounters.
- The marsh's mud tiles can trap the player; alternate directional inputs instead of holding one direction when the character sinks.
Completion Checklist
- Complete the currently reachable part of this route plan: Heal and restock; visit the Move Reminder and scarf house; inspect the Great Marsh binoculars; enter once and collect HM05 immediately; sweep all six areas for items and desired catches; save before approaching the Gym; defeat Barry.
- Review all 151 encounter rows across the per-area tables, including game markers, method band, time-of-day rates, levels, and each conditional requirement; mark conditional rows for their stated revisit.
Pastoria Gym and Crasher Wake
Raise and drain water with colored switches, clear every swimmer and sailor, and defeat Wake's Gyarados, Quagsire, and Floatzel.
Source maps
Pastoria Gym.
Route Plan
Bring Electric coverage for Gyarados and Grass for Quagsire; press switches in an order that creates each bridge path; battle every trainer; restore the final high-water route to Wake; save and heal before the leader.
- No single weakness covers Wake's team: Quagsire is immune to Electric and Gyarados resists Grass, so bring both types or strong neutral alternatives.
- Floatzel is fast and carries Brine pressure once a target falls below half health.
Encounter tables on this page cover 1 in-game map.
Trainers
| Trainer | Route order / placement | Full team | Reward | Access requirement | Optional / rematch note |
|---|---|---|---|---|---|
| Tuber Male JackyTuber Male | Pastoria Gym • trainer 1 on this map |
| ₽104 | Line of sight decides whether you can walk past this trainer. | No Vs. Seeker rematch. |
| Sailor DamianSailor | Pastoria Gym • trainer 2 on this map | ₽768 | Line of sight decides whether you can walk past this trainer. | No Vs. Seeker rematch. | |
| Tuber Female CaitlynTuber Female | Pastoria Gym • trainer 3 on this map | ₽96 | Line of sight decides whether you can walk past this trainer. | No Vs. Seeker rematch. | |
| Sailor SamsonSailor | Pastoria Gym • trainer 4 on this map | ₽768 | Line of sight decides whether you can walk past this trainer. | No Vs. Seeker rematch. | |
| Fisherman ErickFisherman | Pastoria Gym • trainer 5 on this map | ₽768 | Line of sight decides whether you can walk past this trainer. | No Vs. Seeker rematch. | |
| Fisherman WalterFisherman | Pastoria Gym • trainer 6 on this map |
| ₽832 | Line of sight decides whether you can walk past this trainer. | No Vs. Seeker rematch. |
| Leader WakeLeader Wake | Pastoria Gym • scripted | ₽3,600 | Scripted story trigger; complete the local objective described in the route plan. | Major or story battle; not a VS Seeker rematch row. |
Items
| Item | Version | Type | Area / exact direction | Map position | Requirement | Source |
|---|---|---|---|---|---|---|
| TM55 | Diamond / Pearl | NPC / scripted gift | Pastoria Gym: Receive this TM from the Gym Leader immediately after the badge victory. | NPC (13, 4) | Defeat the Gym Leader; this is part of the one-time badge reward. | script bank 120 |
Puzzles, Warps, And Switches
- Yellow switches set low water, green switches set middle water, and blue switches set high water. Follow the newly exposed stairs after each press and avoid resetting a needed bridge until its trainers are cleared.
Completion Checklist
- Complete the currently reachable part of this route plan: Bring Electric coverage for Gyarados and Grass for Quagsire; press switches in an order that creates each bridge path; battle every trainer; restore the final high-water route to Wake; save and heal before the leader.
Galactic Grunt Chase and SecretPotion
Pursue the bomb-carrying Grunt from Pastoria to Valor Lakefront, meet Cynthia, and receive the SecretPotion for Route 210.
Source maps
.
Route Plan
Speak to the Grunt by the marsh; chase him east across Route 213; interact at every stop; defeat him near Valor Lakefront; speak to Cynthia; accept the SecretPotion; Fly to Solaceon for the northern Route 210 road.
- This story chase reuses Pastoria, Route 213, and Valor Lakefront maps already owned by earlier sections, so it intentionally has no map pattern to prevent duplicate extracted tables.
- The Grunt battle is a scripted story trainer and should be listed from the source event attached to its original map section if map-level extraction is exhaustive.
Encounter tables on this page cover 0 in-game maps.
Items
| Item | Version | Type | Area / exact direction | Map position | Requirement | Source |
|---|---|---|---|---|---|---|
| SecretPotion | Diamond / Pearl | Story gift | Galactic Grunt Chase and SecretPotion: Cynthia gives it at Valor Lakefront after the Galactic Grunt chase; use it on the Route 210 Psyduck. | NPC | See the route plan. | editorial script/system note |
Puzzles, Warps, And Switches
- The Grunt moves only after being spoken to at each waypoint. If he seems missing, backtrack to the previous dialogue stop rather than searching Lake Valor.
Completion Checklist
- Complete the currently reachable part of this route plan: Speak to the Grunt by the marsh; chase him east across Route 213; interact at every stop; defeat him near Valor Lakefront; speak to Cynthia; accept the SecretPotion; Fly to Solaceon for the northern Route 210 road.
Route 212, Pokemon Mansion, and Trophy Garden
Complete the optional westbound loop through rain and marshland, raid the Pokemon Mansion, and document Trophy Garden's daily postgame slots.
Source maps
Trophy Garden, Route 212 North, Route 212 Pokémon Mansion Lobby, Route 212 Pokémon Mansion West Rooms, Route 212 Pokémon Mansion East Room, Route 212 South, and Route 212 Shard Weather TM House.
Route Plan
Start from Pastoria and clear Route 212 South; use narrow planks and mud ramps for every item; continue through Route 212 North; explore all mansion rooms; collect TM87 and the Soothe Bell; search Trophy Garden grass; exit at Hearthome.
- Mr. Backlot's special Trophy Garden visitors begin only after the National Dex. The two most recently announced species remain in the garden's special slots.
- One maid permanently blocks the trophy room in original Diamond/Pearl. Platinum's daily maid knockout challenge is excluded because it does not exist in these versions.
Encounter tables on this page cover 7 in-game maps.
Route 212 North
| Pokémon | Games | Levels | Rate | Requirement / notes | ||
|---|---|---|---|---|---|---|
| Morning | Day | Night | ||||
| Grass / cave floor | ||||||
| Budew | DP | 16 | 30% | Rate counts base slots temporarily replaced by hard-shaking Poké Radar patches. | ||
| Kricketune | DP | 17-18 | 20% | 10% | 30% | Rate counts base slots temporarily replaced by hard-shaking Poké Radar patches. |
| Staravia | DP | 17-18 | 15% | 25% | 5% | — |
| Starly | DP | 16 | 20% | — | ||
| Roselia | DP | 16-17 | 15% | Rate counts base slots temporarily replaced by hard-shaking Poké Radar patches. | ||
| Poké Radar (post-National Dex) | ||||||
 Smeargle | DP | 16 or 18 | 22% | National Dex and Poké Radar required; replacement slot applies only in a hard/vigorous-shaking Radar patch. | ||
| Surfing | ||||||
| Psyduck | DP | 20-40 | 90% | — | ||
| Golduck | DP | 20-40 | 10% | — | ||
| Fishing — Old Rod | ||||||
| Magikarp | DP | 3-10 | 100% | — | ||
| Fishing — Good Rod | ||||||
| Magikarp | DP | 10-25 | 55% | — | ||
| Goldeen | DP | 10-25 | 45% | — | ||
| Fishing — Super Rod | ||||||
| Gyarados | DP | 30-55 | 55% | — | ||
| Seaking | DP | 20-50 | 45% | — | ||
Route 212 South
| Pokémon | Games | Levels | Rate | Requirement / notes | ||
|---|---|---|---|---|---|---|
| Morning | Day | Night | ||||
| Grass / cave floor | ||||||
| Bibarel | DP | 18-20 | 35% | 35% | 25% | Rate counts base slots temporarily replaced by hard-shaking Poké Radar patches and GBA dual-slot insertions. |
| Kricketune | DP | 18-19 | 10% | 10% | 30% | Rate counts base slots temporarily replaced by hard-shaking Poké Radar patches. |
| Wooper | DP | 18 | 30% | Rate counts base slots temporarily replaced by hard-shaking Poké Radar patches and GBA dual-slot insertions. | ||
| Roselia | DP | 18-20 | 25% | 25% | 15% | Rate counts base slots temporarily replaced by hard-shaking Poké Radar patches. |
| Poké Radar (post-National Dex) | ||||||
 Grimer | DP | 18 or 20 | 22% | National Dex and Poké Radar required; replacement slot applies only in a hard/vigorous-shaking Radar patch. | ||
| Dual-slot GBA insertion (post-National Dex) | ||||||
 Ekans | DP | 18 or 20 | 8% | National Dex plus Pokémon FireRed inserted in the Nintendo DS GBA slot; replaces grass slots 8-9. | ||
 Lombre | DP | 20 | 4% | National Dex plus Pokémon Sapphire inserted in the Nintendo DS GBA slot; replaces grass slots 8-9. | ||
 Lotad | DP | 18 | 4% | National Dex plus Pokémon Sapphire inserted in the Nintendo DS GBA slot; replaces grass slots 8-9. | ||
| Surfing | ||||||
| Wooper | DP | 20-40 | 90% | — | ||
| Quagsire | DP | 20-40 | 10% | — | ||
| Fishing — Old Rod | ||||||
| Magikarp | DP | 3-10 | 100% | — | ||
| Fishing — Good Rod | ||||||
| Magikarp | DP | 10-25 | 55% | — | ||
| Barboach | DP | 10-25 | 45% | — | ||
| Fishing — Super Rod | ||||||
| Gyarados | DP | 30-55 | 55% | — | ||
| Whiscash | DP | 20-50 | 45% | — | ||
Trophy Garden
| Pokémon | Games | Levels | Rate | Requirement / notes | ||
|---|---|---|---|---|---|---|
| Morning | Day | Night | ||||
| Grass / cave floor | ||||||
| Staravia | DP | 16-17 | 20% | 40% | 20% | — |
| Kricketune | DP | 16-17 | 10% | 10% | 30% | — |
 Pichu | DP | 16 | 30% | 10% | 10% | Rate counts base slots temporarily replaced by Mr. Backlot's daily visitors. |
| Roselia | DP | 16-17 | 30% | — | ||
 Pikachu | DP | 18 | 10% | Rate counts base slots temporarily replaced by Mr. Backlot's daily visitors. | ||
Route 212, Pokemon Mansion, and Trophy Garden
| Pokémon | Games | Levels | Rate | Requirement / notes | ||
|---|---|---|---|---|---|---|
| Morning | Day | Night | ||||
| Trophy Garden daily visitor | ||||||
 Eevee | DP | 16 or 18 by active slot | 5% while active | National Dex; speak to Mr. Backlot once per day Today's and yesterday's announced visitors occupy separate 5% replacement slots. | ||
 Happiny | DP | 16 or 18 by active slot | 5% while active | National Dex; speak to Mr. Backlot once per day Today's and yesterday's announced visitors occupy separate 5% replacement slots. | ||
 Meowth | DP | 16 or 18 by active slot | 5% while active | National Dex; speak to Mr. Backlot once per day Today's and yesterday's announced visitors occupy separate 5% replacement slots. | ||
 Cleffa | DP | 16 or 18 by active slot | 5% while active | National Dex; speak to Mr. Backlot once per day Today's and yesterday's announced visitors occupy separate 5% replacement slots. | ||
| Clefairy | DP | 16 or 18 by active slot | 5% while active | National Dex; speak to Mr. Backlot once per day Today's and yesterday's announced visitors occupy separate 5% replacement slots. | ||
 Igglybuff | DP | 16 or 18 by active slot | 5% while active | National Dex; speak to Mr. Backlot once per day Today's and yesterday's announced visitors occupy separate 5% replacement slots. | ||
 Plusle | DP | 16 or 18 by active slot | 5% while active | National Dex; speak to Mr. Backlot once per day Today's and yesterday's announced visitors occupy separate 5% replacement slots. | ||
 Jigglypuff | DP | 16 or 18 by active slot | 5% while active | National Dex; speak to Mr. Backlot once per day Today's and yesterday's announced visitors occupy separate 5% replacement slots. | ||
 Porygon | DP | 16 or 18 by active slot | 5% while active | National Dex; speak to Mr. Backlot once per day Today's and yesterday's announced visitors occupy separate 5% replacement slots. | ||
 Castform | DP | 16 or 18 by active slot | 5% while active | National Dex; speak to Mr. Backlot once per day Today's and yesterday's announced visitors occupy separate 5% replacement slots. | ||
 Minun | DP | 16 or 18 by active slot | 5% while active | National Dex; speak to Mr. Backlot once per day Today's and yesterday's announced visitors occupy separate 5% replacement slots. | ||
| Marill | DP | 16 or 18 by active slot | 5% while active | National Dex; speak to Mr. Backlot once per day Today's and yesterday's announced visitors occupy separate 5% replacement slots. | ||
 Chansey | DP | 16 or 18 by active slot | 5% while active | National Dex; speak to Mr. Backlot once per day Today's and yesterday's announced visitors occupy separate 5% replacement slots. | ||
| Azurill | DP | 16 or 18 by active slot | 5% while active | National Dex; speak to Mr. Backlot once per day Today's and yesterday's announced visitors occupy separate 5% replacement slots. | ||
 Mime Jr. | DP | 16 or 18 by active slot | 5% while active | National Dex; speak to Mr. Backlot once per day Shared member of the 16-species announcement pool; the ordinary garden table remains version-specific where applicable. | ||
 Bonsly | DP | 16 or 18 by active slot | 5% while active | National Dex; speak to Mr. Backlot once per day Shared member of the 16-species announcement pool; the ordinary garden table remains version-specific where applicable. | ||
Trainers
| Trainer | Route order / placement | Full team | Reward | Access requirement | Optional / rematch note |
|---|---|---|---|---|---|
| Rich Boy JasonRich Boy | Route 212 North • trainer 1 on this map | ₽3,040 | Line of sight decides whether you can walk past this trainer. | No Vs. Seeker rematch. | |
| Lady MelissaLady | Route 212 North • trainer 2 on this map | ₽3,040 | Line of sight decides whether you can walk past this trainer. | Vs. Seeker rematch levels: Lv. 31; Lv. 40; Lv. 60. | |
| Gentleman JeremyGentleman | Route 212 North • trainer 3 on this map | ₽3,800 | Line of sight decides whether you can walk past this trainer. | Vs. Seeker rematch levels: Lv. 31; Lv. 40; Lv. 60. | |
| Socialite ReinaSocialite | Route 212 North • trainer 4 on this map | ₽3,800 | Line of sight decides whether you can walk past this trainer. | Vs. Seeker rematch levels: Lv. 40; Lv. 60. | |
 Policeman BobbyPoliceman | Route 212 North • trainer 5 on this map | ₽720 | Battle is available only at night, 20:00-03:59. Line of sight decides whether you can walk past this trainer. | No Vs. Seeker rematch. | |
| Policeman AlexPoliceman | Route 212 North • trainer 6 on this map | ₽720 | Battle is available only at night, 20:00-03:59. Line of sight decides whether you can walk past this trainer. | No Vs. Seeker rematch. | |
| Policeman DylanPoliceman | Route 212 North • trainer 7 on this map | ₽720 | Battle is available only at night, 20:00-03:59. Line of sight decides whether you can walk past this trainer. | No Vs. Seeker rematch. | |
| Policeman CalebPoliceman | Route 212 North • trainer 8 on this map | ₽760 | Battle is available only at night, 20:00-03:59. Line of sight decides whether you can walk past this trainer. | No Vs. Seeker rematch. | |
| Fisherman JuanFisherman | Route 212 South • trainer 1 on this map | ₽672 | Line of sight decides whether you can walk past this trainer. | No Vs. Seeker rematch. | |
| Fisherman CameronFisherman | Route 212 South • trainer 2 on this map | ₽608 | Line of sight decides whether you can walk past this trainer. | No Vs. Seeker rematch. | |
| Fisherman TravisFisherman | Route 212 South • trainer 3 on this map | ₽544 | Line of sight decides whether you can walk past this trainer. | No Vs. Seeker rematch. | |
 Pokémon Ranger Male TaylorPokémon Ranger Male | Route 212 South • trainer 4 on this map | ₽1,260 | Line of sight decides whether you can walk past this trainer. | Vs. Seeker rematch levels: Lv. 31/Lv. 31; Lv. 40/Lv. 40; Lv. 60/Lv. 60. | |
 Pokémon Ranger Female AllisonPokémon Ranger Female | Route 212 South • trainer 5 on this map | ₽1,260 | Line of sight decides whether you can walk past this trainer. | Vs. Seeker rematch levels: Lv. 30/Lv. 32; Lv. 41/Lv. 39; Lv. 61/Lv. 59. | |
| Pokémon Ranger Male JeffreyPokémon Ranger Male | Route 212 South • trainer 6 on this map | ₽1,260 | Line of sight decides whether you can walk past this trainer. | No Vs. Seeker rematch. | |
| Policeman DannyPoliceman | Route 212 South • trainer 7 on this map | ₽800 | Battle is available only at night, 20:00-03:59. Line of sight decides whether you can walk past this trainer. | Vs. Seeker rematch levels: Lv. 28/Lv. 30; Lv. 38/Lv. 40; Lv. 53/Lv. 55. | |
| Scientist StefanoScientist | Route 212 South • trainer 8 on this map |
| ₽1,008 | Line of sight decides whether you can walk past this trainer. | No Vs. Seeker rematch. |
| Collector DominiqueCollector | Route 212 South • trainer 9 on this map | ₽1,216 | Line of sight decides whether you can walk past this trainer. | No Vs. Seeker rematch. | |
| Scientist ShaunScientist | Route 212 South • trainer 10 on this map | ₽912 | Line of sight decides whether you can walk past this trainer. | Vs. Seeker rematch levels: Lv. 30/Lv. 28; Lv. 40/Lv. 36; Lv. 53/Lv. 53. | |
 Parasol Lady AlexaParasol Lady | Route 212 South • trainer 11 on this map | ₽608 | Line of sight decides whether you can walk past this trainer. | Vs. Seeker rematch levels: Lv. 28/Lv. 30; Lv. 38/Lv. 38; Lv. 53/Lv. 53. | |
| Parasol Lady SabrinaParasol Lady | Route 212 South • trainer 12 on this map | ₽672 | Line of sight decides whether you can walk past this trainer. | No Vs. Seeker rematch. |


Items
| Item | Version | Type | Area / exact direction | Map position | Requirement | Source |
|---|---|---|---|---|---|---|
| Rose Incense | Diamond / Pearl | Visible item ball | Route 212 North: Pick up the item ball in the western part of Route 212 North, 14 tiles west and 19 tiles south of the Route 212 Pokémon Mansion Lobby doorway or transition. | (456, 791) | See the route notes for any HM, Bicycle, time or story requirement. | Story event |
| TM11 | Diamond / Pearl | Visible item ball | Route 212 North: Pick up the item ball in the southwestern part of Route 212 North, 17 tiles west and 32 tiles south of the Route 212 Pokémon Mansion Lobby doorway or transition. | (453, 804) | See the route notes for any HM, Bicycle, time or story requirement. | Story event |
| Elixir | Diamond / Pearl | Visible item ball | Route 212 North: Pick up the item ball in the southern part of Route 212 North, 11 tiles west and 49 tiles south of the Route 212 Pokémon Mansion Lobby doorway or transition. | (459, 821) | See the route notes for any HM, Bicycle, time or story requirement. | Story event |
| Great Ball | Diamond / Pearl | Visible item ball | Route 212 Pokémon Mansion West Rooms: Pick up the item ball in the northwestern part of Route 212 Pokémon Mansion West Rooms, 6 tiles north of the Route 212 Pokémon Mansion Lobby doorway or transition. | (4, 3) | See the route notes for any HM, Bicycle, time or story requirement. | Story event |
| TM87 | Diamond / Pearl | Visible item ball | Route 212 Pokémon Mansion East Room: Pick up the item ball in the northeastern part of Route 212 Pokémon Mansion East Room, 5 tiles east and 7 tiles north of the Route 212 Pokémon Mansion Lobby doorway or transition. | (21, 3) | See the route notes for any HM, Bicycle, time or story requirement. | Story event |
| Antidote | Diamond / Pearl | Visible item ball | Route 212 South: Pick up the item ball in the southwestern part of Route 212 South, 62 tiles west and 14 tiles south of the Route 212 Shard Weather TM House doorway or transition. | (455, 860) | See the route notes for any HM, Bicycle, time or story requirement. | Story event |
| TM84 | Diamond / Pearl | Visible item ball | Route 212 South: Pick up the item ball in the southwestern part of Route 212 South, 42 tiles west and 6 tiles south of the Route 212 Shard Weather TM House doorway or transition. | (475, 852) | See the route notes for any HM, Bicycle, time or story requirement. | Story event |
| TM62 | Diamond / Pearl | Visible item ball | Route 212 South: Pick up the item ball in the central part of Route 212 South, 10 tiles west of the Route 212 Shard Weather TM House doorway or transition. | (507, 846) | See the route notes for any HM, Bicycle, time or story requirement. | Story event |
| Zinc | Diamond / Pearl | Visible item ball | Route 212 South: Pick up the item ball in the central part of Route 212 South, 5 tiles east and 4 tiles north of the Route 212 Shard Weather TM House doorway or transition. | (522, 842) | See the route notes for any HM, Bicycle, time or story requirement. | Story event |
| X Special | Diamond / Pearl | Visible item ball | Route 212 South: Pick up the item ball in the northeastern part of Route 212 South, 28 tiles east and 11 tiles north of the Route 212 Shard Weather TM House doorway or transition. | (545, 835) | See the route notes for any HM, Bicycle, time or story requirement. | Story event |
| TM06 | Diamond / Pearl | Visible item ball | Route 212 South: Pick up the item ball in the southeastern part of Route 212 South, 30 tiles east and 16 tiles south of the Route 212 Shard Weather TM House doorway or transition. | (547, 862) | See the route notes for any HM, Bicycle, time or story requirement. | Story event |
| Revive | Diamond / Pearl | Visible item ball | Route 212 South: Pick up the item ball in the eastern part of Route 212 South, 41 tiles east and 2 tiles north of the Route 212 Shard Weather TM House doorway or transition. | (558, 844) | See the route notes for any HM, Bicycle, time or story requirement. | Story event |
| Aspear Berry | Diamond / Pearl | Berry tree | Route 212 North: Harvest berry patch 51 in the southern part of Route 212 North, 10 tiles west and 25 tiles south of the Route 212 Pokémon Mansion Lobby doorway or transition. The plot can be replanted after the initial harvest. | (460, 797) | Reach the outdoor patch on the named route or town; harvest its initial berries before planting a replacement. | berry table ov52_021D76F8, patch 51 |
| Sitrus Berry | Diamond / Pearl | Berry tree | Route 212 North: Harvest berry patch 50 in the southern part of Route 212 North, 9 tiles west and 25 tiles south of the Route 212 Pokémon Mansion Lobby doorway or transition. The plot can be replanted after the initial harvest. | (461, 797) | Reach the outdoor patch on the named route or town; harvest its initial berries before planting a replacement. | berry table ov52_021D76F8, patch 50 |
| Lum Berry | Diamond / Pearl | Berry tree | Route 212 North: Harvest berry patch 53 in the southwestern part of Route 212 North, 22 tiles west and 45 tiles south of the Route 212 Pokémon Mansion Lobby doorway or transition. The plot can be replanted after the initial harvest. | (448, 817) | Reach the outdoor patch on the named route or town; harvest its initial berries before planting a replacement. | berry table ov52_021D76F8, patch 53 |
| Tamato Berry | Diamond / Pearl | Berry tree | Route 212 North: Harvest berry patch 52 in the southwestern part of Route 212 North, 21 tiles west and 45 tiles south of the Route 212 Pokémon Mansion Lobby doorway or transition. The plot can be replanted after the initial harvest. | (449, 817) | Reach the outdoor patch on the named route or town; harvest its initial berries before planting a replacement. | berry table ov52_021D76F8, patch 52 |
| Pecha Berry | Diamond / Pearl | Berry tree | Route 212 South: Harvest berry patch 54 in the southeastern part of Route 212 South, 42 tiles east and 8 tiles south of the Route 212 Shard Weather TM House doorway or transition. The plot can be replanted after the initial harvest. | (559, 854) | Reach the outdoor patch on the named route or town; harvest its initial berries before planting a replacement. | berry table ov52_021D76F8, patch 54 |
| Pinap Berry | Diamond / Pearl | Berry tree | Route 212 South: Harvest berry patch 55 in the southeastern part of Route 212 South, 43 tiles east and 8 tiles south of the Route 212 Shard Weather TM House doorway or transition. The plot can be replanted after the initial harvest. | (560, 854) | Reach the outdoor patch on the named route or town; harvest its initial berries before planting a replacement. | berry table ov52_021D76F8, patch 55 |
| Pinap Berry | Diamond / Pearl | Berry tree | Route 212 South: Harvest berry patch 56 in the southeastern part of Route 212 South, 44 tiles east and 8 tiles south of the Route 212 Shard Weather TM House doorway or transition. The plot can be replanted after the initial harvest. | (561, 854) | Reach the outdoor patch on the named route or town; harvest its initial berries before planting a replacement. | berry table ov52_021D76F8, patch 56 |
| Pinap Berry | Diamond / Pearl | Berry tree | Route 212 South: Harvest berry patch 57 in the southeastern part of Route 212 South, 45 tiles east and 8 tiles south of the Route 212 Shard Weather TM House doorway or transition. The plot can be replanted after the initial harvest. | (562, 854) | Reach the outdoor patch on the named route or town; harvest its initial berries before planting a replacement. | berry table ov52_021D76F8, patch 57 |
| Soothe Bell | Diamond / Pearl | NPC / scripted gift | Route 212 Pokémon Mansion West Rooms: Speak to the item-giving NPC in the central part of Route 212 Pokémon Mansion West Rooms, 1 tile west and 3 tiles north of the Route 212 Pokémon Mansion Lobby doorway or transition. | NPC (11, 6) | Reach Route 212 Pokémon Mansion West Rooms and complete the item-giving NPC's one-time dialogue. | script bank 420 |
| TM11 Sunny Day | Diamond / Pearl | Repeatable shard exchange | Route 212, Pokemon Mansion, and Trophy Garden: Trade 10 Red Shards to the collector in the Route 212 Shard/Weather TM House. | NPC | Bring 10 Red Shards; the exchange can be repeated. | editorial script/system note |
| TM18 Rain Dance | Diamond / Pearl | Repeatable shard exchange | Route 212, Pokemon Mansion, and Trophy Garden: Trade 10 Blue Shards to the collector in the Route 212 Shard/Weather TM House. | NPC | Bring 10 Blue Shards; the exchange can be repeated. | editorial script/system note |
| TM37 Sandstorm | Diamond / Pearl | Repeatable shard exchange | Route 212, Pokemon Mansion, and Trophy Garden: Trade 10 Yellow Shards to the collector in the Route 212 Shard/Weather TM House. | NPC | Bring 10 Yellow Shards; the exchange can be repeated. | editorial script/system note |
| TM07 Hail | Diamond / Pearl | Repeatable shard exchange | Route 212, Pokemon Mansion, and Trophy Garden: Trade 10 Green Shards to the collector in the Route 212 Shard/Weather TM House. | NPC | Bring 10 Green Shards; the exchange can be repeated. | editorial script/system note |
Hidden Items
| Hidden item | Area / plain-English placement | QA coordinate | Requirement | Source |
|---|---|---|---|---|
| Great Ball | Route 212 North: Use the Dowsing Machine in the southeastern part of Route 212 North, 5 tiles east and 31 tiles south of the Route 212 Pokémon Mansion Lobby doorway or transition and inspect that exact ground tile. | (475, 803) | Found with the Dowsing Machine Pokétch app. See the route notes for any HM, Bicycle, time or story requirement. | Story event |
| Super Potion | Route 212 North: Use the Dowsing Machine in the eastern part of Route 212 North, 3 tiles west and 7 tiles south of the Route 212 Pokémon Mansion Lobby doorway or transition and inspect that exact ground tile. | (467, 779) | Found with the Dowsing Machine Pokétch app. See the route notes for any HM, Bicycle, time or story requirement. | Story event |
| Burn Heal | Route 212 Pokémon Mansion West Rooms: Use the Dowsing Machine in the southeastern part of Route 212 Pokémon Mansion West Rooms, 3 tiles east of the Route 212 Pokémon Mansion Lobby doorway or transition and inspect that exact ground tile. | (23, 9) | Found with the Dowsing Machine Pokétch app. See the route notes for any HM, Bicycle, time or story requirement. | Story event |
| Protein | Route 212 South: Use the Dowsing Machine in the southwestern part of Route 212 South, 24 tiles west and 12 tiles south of the Route 212 Shard Weather TM House doorway or transition and inspect that exact ground tile. | (493, 858) | Found with the Dowsing Machine Pokétch app. See the route notes for any HM, Bicycle, time or story requirement. | Story event |
| Rare Candy | Route 212 South: Use the Dowsing Machine in the northeastern part of Route 212 South, 44 tiles east and 11 tiles north of the Route 212 Shard Weather TM House doorway or transition and inspect that exact ground tile. | (561, 835) | Found with the Dowsing Machine Pokétch app. See the route notes for any HM, Bicycle, time or story requirement. | Story event |
| Great Ball | Route 212 South: Use the Dowsing Machine in the southeastern part of Route 212 South, 17 tiles east and 5 tiles south of the Route 212 Shard Weather TM House doorway or transition and inspect that exact ground tile. | (534, 851) | Found with the Dowsing Machine Pokétch app. See the route notes for any HM, Bicycle, time or story requirement. | Story event |
| Revive | Route 212 South: Use the Dowsing Machine in the southeastern part of Route 212 South, 16 tiles east and 11 tiles south of the Route 212 Shard Weather TM House doorway or transition and inspect that exact ground tile. | (533, 857) | Found with the Dowsing Machine Pokétch app. See the route notes for any HM, Bicycle, time or story requirement. | Story event |
| Hyper Potion | Route 212 South: Use the Dowsing Machine in the eastern part of Route 212 South, 54 tiles east and 7 tiles north of the Route 212 Shard Weather TM House doorway or transition and inspect that exact ground tile. | (571, 839) | Found with the Dowsing Machine Pokétch app. See the route notes for any HM, Bicycle, time or story requirement. | Story event |
| Heart Scale | Route 212 South: Use the Dowsing Machine in the central part of Route 212 South, 10 tiles east and 1 tile south of the Route 212 Shard Weather TM House doorway or transition and inspect that exact ground tile. | (527, 847) | Found with the Dowsing Machine Pokétch app. See the route notes for any HM, Bicycle, time or story requirement. | Story event |
| Ether | Route 212 South: Use the Dowsing Machine in the northeastern part of Route 212 South, 53 tiles east and 11 tiles north of the Route 212 Shard Weather TM House doorway or transition and inspect that exact ground tile. | (570, 835) | Found with the Dowsing Machine Pokétch app. See the route notes for any HM, Bicycle, time or story requirement. | Story event |
| Tinymushroom | Route 212 South: Use the Dowsing Machine in the southwestern part of Route 212 South, 46 tiles west and 10 tiles south of the Route 212 Shard Weather TM House doorway or transition and inspect that exact ground tile. | (471, 856) | Found with the Dowsing Machine Pokétch app. See the route notes for any HM, Bicycle, time or story requirement. | Story event |
Puzzles, Warps, And Switches
- On Route 212 South, use the Bicycle's fast gear to climb muddy slopes and walk carefully along narrow beams. Clear each raised island before dropping into the next marsh patch.
Completion Checklist
- Complete the currently reachable part of this route plan: Start from Pastoria and clear Route 212 South; use narrow planks and mud ramps for every item; continue through Route 212 North; explore all mansion rooms; collect TM87 and the Soothe Bell; search Trophy Garden grass; exit at Hearthome.
- Review all 49 encounter rows across the per-area tables, including game markers, method band, time-of-day rates, levels, and each conditional requirement; mark conditional rows for their stated revisit.
Dex quick links
